Easiest Way to Make Homemade Tasty pasta

Easiest Way to Make Homemade Tasty pasta

Tasty pasta.

Tasty pasta

Hello everybody, I hope you are having an incredible day today. Today, we're going to make a distinctive dish, tasty pasta. It is one of my favorites. For mine, I'm gonna make it a little bit tasty. This will be really delicious.

Tasty pasta is one of the most favored of recent trending foods on earth. It is enjoyed by millions every day. It is easy, it is quick, it tastes yummy. They're fine and they look fantastic. Tasty pasta is something which I've loved my whole life.

To begin with this particular recipe, we must first prepare a few ingredients. You can cook tasty pasta using 7 ingredients and 6 steps. Here is how you cook it.

The ingredients needed to make Tasty pasta:

  1. {Get 1/2 packages of pasta.
  2. {Take 200 grams of ground beef.
  3. {Get 2 small of tomatos.
  4. {Take 1 dash of mixed spices.
  5. {Get 1 dash of parmesan cheese.
  6. {Get 1/3 cup of ketchup.
  7. {Prepare 1 bunch of creme spinach.

Instructions to make Tasty pasta:

  1. boil water and add in your favorite kind of pasta.
  2. cut up tomatos into cubes.
  3. fry ground beef throuw in spices and tomatos.
  4. add spinach creme cubes.
  5. add ketchup and pasta.
  6. sprinkle cheese on top.

So that is going to wrap it up for this special food tasty pasta recipe. Thanks so much for reading. I am sure you can make this at home. There is gonna be more interesting food in home recipes coming up. Don't forget to save this page on your browser, and share it to your loved ones, friends and colleague. Thank you for reading. Go on get cooking!

How to Make Super Quick Homemade Moong Dal curry

How to Make Super Quick Homemade Moong Dal curry

Moong Dal curry.

Moong Dal curry

Hello everybody, it's Drew, welcome to our recipe page. Today, I'm gonna show you how to prepare a distinctive dish, moong dal curry. One of my favorites food recipes. This time, I'm gonna make it a little bit unique. This is gonna smell and look delicious.

Moong Dal curry is one of the most favored of current trending foods on earth. It is enjoyed by millions every day. It's easy, it's fast, it tastes yummy. They're fine and they look wonderful. Moong Dal curry is something which I have loved my whole life.

To begin with this recipe, we must prepare a few components. You can cook moong dal curry using 12 ingredients and 4 steps. Here is how you cook it.

The ingredients needed to make Moong Dal curry:

  1. {Make ready 3/4 cup of Yellow moong dal.
  2. {Get 1 of Tomato.
  3. {Get 1 of Green chilli.
  4. {Make ready 1/2 tsp of Garlic paste.
  5. {Take 1/2 tsp of Turmeric Powder.
  6. {Make ready leaves of Few Chopped coriander.
  7. {Get of As per taste Salt.
  8. {Get of As per taste Chilli powder.
  9. {Get 1/2 tsp of Jeera.
  10. {Get 1 pinch of Asafoetida.
  11. {Get 1/2 tsp of Dhaniya jeera powder.
  12. {Make ready 3 tbsp of Oil.

Steps to make Moong Dal curry:

  1. Wash and soak mung Dal at least for an hour. Discard water at the time of cooking. Chop tomato finely. Cut chilli..
  2. Heat oil in a pan. Add jeera and wait till it turns light brown. Then add green chilli, garlic paste, turmeric powder and red chilli powder. Add 3 glasses water right away. Add salt and dhaniya jeera powder. Wait till the water boils. Add Dal, cover and cook on low heat..
  3. Add tomatoes when Dal is almost cooked. Cover and cook for another one minute or two until the tomatoes are soft. You may want to leave the pan uncovered while cooking tomatoes if the curry is too watery. But do not overcook the Dal because if it gets too mushy, it will turn into Dal to eat with rice. Garnish dal with coriander leaves..
  4. Serve Dal with onion (thin slices of onion sprinkled with few coriendar leaves, salt, chilli powder and a few drops of lemon) and bhakhri/roti. Squeeze some lemon juice if you want to enhance it's taste further..

So that's going to wrap it up with this exceptional food moong dal curry recipe. Thanks so much for your time. I am confident you can make this at home. There is gonna be more interesting food at home recipes coming up. Remember to bookmark this page in your browser, and share it to your loved ones, colleague and friends. Thanks again for reading. Go on get cooking!

Easiest Way to Make Homemade Beet and Goat Cheese Tart

Easiest Way to Make Homemade Beet and Goat Cheese Tart

Beet and Goat Cheese Tart.

Beet and Goat Cheese Tart

Hey everyone, it is me again, Dan, welcome to our recipe site. Today, we're going to prepare a distinctive dish, beet and goat cheese tart. It is one of my favorites food recipes. For mine, I will make it a bit unique. This will be really delicious.

Beet and Goat Cheese Tart is one of the most well liked of recent trending meals in the world. It is appreciated by millions daily. It's simple, it's fast, it tastes yummy. They are fine and they look wonderful. Beet and Goat Cheese Tart is something that I have loved my entire life.

To get started with this particular recipe, we have to first prepare a few components. You can cook beet and goat cheese tart using 12 ingredients and 11 steps. Here is how you cook that.

The ingredients needed to make Beet and Goat Cheese Tart:

  1. {Prepare 1 of frozen puff pastry sheet.
  2. {Take 3 Tbsp of Parmesan cheese, finely grated.
  3. {Get 4 of beets, cooked.
  4. {Make ready 6 oz of goat cheese.
  5. {Prepare 4 Tbsp of milk, warm.
  6. {Take 1 clove of garlic.
  7. {Prepare 1 tsp of lemon zest.
  8. {Make ready 1/2 tsp of salt.
  9. {Take of Ground pepper, to taste.
  10. {Prepare 2 of scallions.
  11. {Prepare A few of arugula leaves.
  12. {Take of Balsamic vinegar, to taste.

Instructions to make Beet and Goat Cheese Tart:

  1. Preheat oven at 450 degrees F. Line a cookie sheet with parchment paper..
  2. Melissa Clark, in The New York Times, suggests to sprinkle grated Parmesan cheese on the parchment paper. I like that idea, so sprinkle the Parmesan cheese over an area slightly smaller than the puff pastry sheet. Unroll the defrosted puff pastry over the grated cheese..
  3. Using a knife, make a slight cut 1/2 inch from the borders all around the pastry sheet without cutting through..
  4. Slice the beets..
  5. Mix the goat cheese and the warm milk. Add garlic, lemon zest, salt and pepper..
  6. Spread mixture on the puff pastry within the cut borders..
  7. Place the beets over the goat cheese mixture..
  8. Slice the scallions, separating the white parts from the green parts. Sprinkle the white slices over the beets. Reserve the green slices..
  9. Bake for 25 minutes (or the recommended time suggested by the manufacturer)..
  10. Sprinkle the green slices of the scallions. Arrange a few arugula leaves on top. Drizzle balsamic vinegar..
  11. Serve and enjoy..

So that's going to wrap this up for this special food beet and goat cheese tart recipe. Thank you very much for reading. I'm sure that you can make this at home. There's gonna be interesting food at home recipes coming up. Don't forget to bookmark this page in your browser, and share it to your loved ones, colleague and friends. Thanks again for reading. Go on get cooking!

Easiest Way to Make Award-winning Coconut curry ramen

Easiest Way to Make Award-winning Coconut curry ramen

Coconut curry ramen.

Coconut curry ramen

Hello everybody, it's Brad, welcome to my recipe site. Today, we're going to prepare a distinctive dish, coconut curry ramen. It is one of my favorites food recipes. This time, I am going to make it a little bit unique. This will be really delicious.

Coconut curry ramen is one of the most favored of recent trending meals on earth. It is appreciated by millions daily. It's simple, it's fast, it tastes yummy. Coconut curry ramen is something which I've loved my whole life. They're fine and they look wonderful.

To begin with this particular recipe, we have to first prepare a few components. You can have coconut curry ramen using 19 ingredients and 8 steps. Here is how you can achieve that.

The ingredients needed to make Coconut curry ramen:

  1. {Prepare 8 cups of chicken stock or mushroom stock.
  2. {Make ready 2 of small knobs of ginger julienned.
  3. {Get 10 cloves of garlic chopped.
  4. {Take 5 tbsp of yellow or red curry paste.
  5. {Get 2 of large yellow onion chopped.
  6. {Prepare 4 cups of light coconut milk.
  7. {Make ready 2-4 tbsp of brown sugar.
  8. {Take 1 tsp of ground turmeric.
  9. {Get 2 tbsp of miso paste (optional).
  10. {Make ready 2 tbsp of toasted sesame oil.
  11. {Prepare of For heat I added to 2 red chilies but its optional.
  12. {Make ready of Accouterments for serving:.
  13. {Get of Sliced bamboo shoots.
  14. {Make ready of sautéed sliced shitake.
  15. {Prepare of sliced green onion.
  16. {Prepare of soft boiled egg.
  17. {Prepare of black sesame seeds.
  18. {Make ready of yellow corn.
  19. {Prepare of ramen noodles.

Instructions to make Coconut curry ramen:

  1. Heat a large pot over medium-high heat. Once hot, add oil, garlic, ginger, and onion (add chilies here if using). Sauté, stirring occasionally for 5-8 minutes or until the onion has developed a slight sear (browned edges)..
  2. Add curry paste and sauté for 1-2 minutes more, stirring frequently. Then add vegetable broth and coconut milk and stir to deglaze the bottom of the pan..
  3. Bring to a simmer over medium heat, then reduce heat to low and cover. Simmer on low for at least 1 hour, up to 2-3, stirring occasionally. The longer it cooks, the more the flavor will deepen and develop.
  4. Taste broth and adjust seasonings as needed, adding coconut sugar for a little sweetness, turmeric for more intense curry flavor, or more sesame oil for nuttiness..
  5. Once you have the broth where you want it run it though a sieve and return back to the pot.
  6. About 10 minutes before serving, prepare any desired toppings/sides, such as noodles, sautéed shitake mushrooms, or green onion (optional)..
  7. If using miso paste Just before serving, scoop out 1/2 cup of the broth and whisk in the miso paste. Once fully dissolved, add back to the pot and turn off the heat. Stir to combine..
  8. To serve, divide noodles of choice between serving bowls. Top with broth and desired toppings.

So that is going to wrap this up for this special food coconut curry ramen recipe. Thanks so much for your time. I'm confident you can make this at home. There is gonna be interesting food in home recipes coming up. Don't forget to save this page in your browser, and share it to your loved ones, colleague and friends. Thank you for reading. Go on get cooking!

Easiest Way to Prepare Quick Water Melon Juice

Easiest Way to Prepare Quick Water Melon Juice

Water Melon Juice.

Water Melon Juice

Hey everyone, hope you're having an incredible day today. Today, we're going to make a special dish, water melon juice. One of my favorites. This time, I will make it a bit unique. This is gonna smell and look delicious.

Water Melon Juice is one of the most favored of current trending meals in the world. It's enjoyed by millions every day. It's easy, it's fast, it tastes delicious. Water Melon Juice is something which I have loved my whole life. They are nice and they look fantastic.

To begin with this particular recipe, we must first prepare a few components. You can cook water melon juice using 6 ingredients and 4 steps. Here is how you cook that.

The ingredients needed to make Water Melon Juice:

  1. {Get 1/2 of water melon.
  2. {Make ready 3 tbsp of sugar (up to your choice).
  3. {Get 1 tsp of black salt.
  4. {Make ready 2 tbsp of lemon juice.
  5. {Prepare 1/2 bottle of white drink (Sprite or 7 up).
  6. {Get cubes of Ice.

Steps to make Water Melon Juice:

  1. Water Melon ko wash kar lein aur iss ko half Kar lein aur chilka remove Kar dein aur roughly kat Kar lein..
  2. Water Melon, sugar, black salt and lemon juice Dal ka blend Kar lein..
  3. Stain Kar lein aur ice cubes aur white drink Dal ka serve Kary..
  4. Tasty and Refreshing 👌 drink ready Hy..

So that is going to wrap this up with this exceptional food water melon juice recipe. Thank you very much for your time. I am sure that you will make this at home. There is gonna be interesting food in home recipes coming up. Don't forget to bookmark this page in your browser, and share it to your family, colleague and friends. Thanks again for reading. Go on get cooking!

Simple Way to Prepare Perfect Spring Onion Pancakes:

Simple Way to Prepare Perfect Spring Onion Pancakes:

Spring Onion Pancakes:.

Spring Onion Pancakes:

Hello everybody, it's me, Dave, welcome to my recipe page. Today, we're going to prepare a special dish, spring onion pancakes:. It is one of my favorites. For mine, I'm gonna make it a little bit tasty. This will be really delicious.

Spring Onion Pancakes: is one of the most popular of recent trending foods in the world. It is easy, it is fast, it tastes delicious. It is enjoyed by millions every day. They are fine and they look fantastic. Spring Onion Pancakes: is something that I have loved my entire life.

To get started with this particular recipe, we must prepare a few ingredients. You can have spring onion pancakes: using 16 ingredients and 5 steps. Here is how you cook it.

The ingredients needed to make Spring Onion Pancakes::

  1. {Make ready 2 cups of all-purpose flour.
  2. {Get 3/4 cup of water, 1/2 hot boiling water + 1/4 cold water.
  3. {Make ready 1 Tbsp of vegetable cooking oil.
  4. {Prepare 1 Tbsp of cooking oil.
  5. {Prepare 2 cups of chopped Spring onions, use green part only.
  6. {Prepare 1 of red chilli finely chopped.
  7. {Take 1/4 cup of coriander chopped.
  8. {Prepare 1/2 tsp of salt.
  9. {Prepare 1 tbsp of red chilli flakes or to taste.
  10. {Make ready of 🌻Dipping sauce:.
  11. {Prepare 1 Tbsp of light soy sauce.
  12. {Prepare 1 tsp. of oyster sauce, optional.
  13. {Take 1/2 Tbsp of sesame oil.
  14. {Make ready 1/4 tsp. of salt.
  15. {Get 1 Tbsp of chili oil chopped green onion and coriander.
  16. {Get of All dipping ingredients mix in a bowl and set aside.

Steps to make Spring Onion Pancakes::

  1. Mix salt with all-purpose flour. Prepare a large mixing bowl. Make a small hole in center and then pour the hot water in. Wait for 10 minutes and then stir in the cold water and vegetable oil. Mix everything to form a ball, cover and rest for 5 minutes and then knead until very smooth. The dough should be quite soft. Cover the rest for 20 to 30 minutes..
  2. After resting, the dough should be quite easy to roll out. Divide the large dough into 4 pieces and roll each piece into a large around circle. Brush some oil, sprinkle red chilli flakes and chopped spring onions, coriander and chilli (leave the the edge empty)..
  3. Roll up the circle into a cylinder. And further roll into the shape of a snail. Cover with wet cloth and rest for 10 to 15 minutes.Roll the snail out to another thin circle..
  4. Brush some cooking oil on the pan and move the circle into the pan. Use medium flame to pan-fry until the surface becomes brown around 2-3 minutes. And turn over to fry for another 1 to 2 minutes. Use a spatula to press the circle from time and time especially the central part to ensure the circle is evenly fried..
  5. Remove the circle out and cut into wedges. Serve with dipping sauce. Enjoy !!!.

So that's going to wrap it up with this special food spring onion pancakes: recipe. Thank you very much for your time. I'm sure you will make this at home. There is gonna be interesting food at home recipes coming up. Remember to bookmark this page in your browser, and share it to your family, colleague and friends. Thanks again for reading. Go on get cooking!

Steps to Make Award-winning Hearty mung bean and rainbow Swiss chard
soup

Steps to Make Award-winning Hearty mung bean and rainbow Swiss chard soup

Hearty mung bean and rainbow Swiss chard soup. Flavescens, is a heritage leafy green often referred to as leaf A shared characteristic of both beets and Rainbow Swiss chard is a visible one. They both contain the compound, betalain. This soup is PERFECT for winter.

Hearty mung bean and rainbow Swiss chard soup I hope this meal becomes a staple in your house like it has for us! Mung beans are a little bit sweeter in taste and from a quick google search, I found that they're quite often mashed up and used as a paste in Asian. Hearty mung bean and rainbow Swiss chard soup. carrots, peeled and chopped•Swiss chard•mung beans•olive oil (better if extra-virgin)•butter•turmeric•cumin•ground coriander.

Hey everyone, it's me again, Dan, welcome to our recipe site. Today, I will show you a way to prepare a special dish, hearty mung bean and rainbow swiss chard soup. It is one of my favorites. For mine, I'm gonna make it a little bit tasty. This is gonna smell and look delicious.

Flavescens, is a heritage leafy green often referred to as leaf A shared characteristic of both beets and Rainbow Swiss chard is a visible one. They both contain the compound, betalain. This soup is PERFECT for winter.

Hearty mung bean and rainbow Swiss chard soup is one of the most popular of recent trending meals in the world. It's appreciated by millions daily. It's simple, it is fast, it tastes delicious. Hearty mung bean and rainbow Swiss chard soup is something that I've loved my whole life. They're nice and they look fantastic.

To begin with this particular recipe, we have to first prepare a few ingredients. You can have hearty mung bean and rainbow swiss chard soup using 17 ingredients and 4 steps. Here is how you can achieve that.

The ingredients needed to make Hearty mung bean and rainbow Swiss chard soup:

  1. {Make ready 4 of carrots, peeled and chopped.
  2. {Prepare 100 g of Swiss chard.
  3. {Get 250 g of mung beans.
  4. {Get 1/2 of onion, chopped.
  5. {Get 1 tsp of olive oil (better if extra-virgin).
  6. {Take 1 Tbsp of turmeric.
  7. {Take 1 Tbsp of cumin.
  8. {Take 1/2 Tbsp of ground coriander.
  9. {Get 1 Tbsp of vegetable bullion.
  10. {Prepare 2 of bay leaves.
  11. {Get to taste of Dried parsley.
  12. {Prepare of Black pepper.
  13. {Get of Salt.
  14. {Get 1 knob of butter.
  15. {Take 1/2 cup of coconut milk.
  16. {Make ready 1 Tbsp of strawberry jam (or other conserve).
  17. {Get 2 dashes of umeshu or lychee wine (or any fruity wine).

Dried beans and pulses give texture to our food and added nutrition in the winter months. I love to use them in stews and chunky soups. Combining dried cannellini beans with chard makes a really hearty winter soup that will warm the whole family. Chard -- sometimes called Swiss chard or rainbow chard (when it sports brightly colored stalks) -- really is a relative of the beet.

Steps to make Hearty mung bean and rainbow Swiss chard soup:

  1. Heat the olive oil in a pan on medium-high heat, l and sauté the chopped onions and carrots, stirring regularly for about 3-5 mins..
  2. Prepare the vegetable stock adding 500 ml of boiling water to the vegetable bullion. Add the beans, all the dry ingredients and the bay leaves to the pan, then add the stock. Let it cook for 25', stirring regularly to prevent sticking..
  3. Remove the bay leaves. Add the butter, jam and coconut milk. Add more water if necessary, stir well and continue to cook for 10 more minutes. At this point it's easier for the soup to stick to the pan so I recommend stirring every 3-5 minutes. Add the umeshu or sweet wine, stir well and let the soup simmer for another 15 minutes or until the beans are fully cooked..
  4. Serve with croutons or crunchy bread with a dash of olive olive and oregano (optional). Here, I have used "freselle" (made by my mother, with fennel seeds), a type of Neapolitan crunchy bread - we love it with tomatoes, tuna and oregano!.

But unlike traditional beets -- which put their energy into producing finger-staining roots, chard instead produces big, tender leaves and crunchy stalks. A girl with supernatural luck, a bright smile, and a candid personality. She is surprisingly wise, and sometimes reveals poignant insight that seems inconsistent with her appearance. She is interested in medicine, and also reads books on herbal remedies. In the morning, rinse beans well in a sieve under running water.

So that's going to wrap it up for this special food hearty mung bean and rainbow swiss chard soup recipe. Thanks so much for your time. I am confident you can make this at home. There's gonna be more interesting food in home recipes coming up. Remember to bookmark this page on your browser, and share it to your loved ones, colleague and friends. Thanks again for reading. Go on get cooking!

How to Prepare Any-night-of-the-week Kapsalon

How to Prepare Any-night-of-the-week Kapsalon

Kapsalon. I have delicious recipe for you. In this video I make kapsalon. I show you how easy a recipe can be and and what you need. ✰ Don't want to miss a video.

Kapsalon Love the industrial metal look with soft white draping! Bekijk meer ideeën over kapsalon interieur, kapsalons, kapsalon inrichting. Bekijk meer ideeën over kapsalons, kapsalon interieur, kapsalon inrichting.

Hello everybody, it's me again, Dan, welcome to our recipe site. Today, I'm gonna show you how to prepare a special dish, kapsalon. It is one of my favorites. This time, I will make it a bit tasty. This will be really delicious.

Kapsalon is one of the most favored of current trending meals in the world. It's appreciated by millions daily. It's easy, it is fast, it tastes delicious. Kapsalon is something that I have loved my whole life. They're fine and they look fantastic.

I have delicious recipe for you. In this video I make kapsalon. I show you how easy a recipe can be and and what you need. ✰ Don't want to miss a video.

To begin with this recipe, we must first prepare a few components. You can have kapsalon using 12 ingredients and 10 steps. Here is how you cook that.

The ingredients needed to make Kapsalon:

  1. {Prepare 2 of serving French fries (see recipe).
  2. {Get 1 cup of Marinated chicken (see recipe).
  3. {Make ready of Gouda cheese as required.
  4. {Get of Salad.
  5. {Prepare 1 cup of Iceberg or lettuce as required.
  6. {Take 1 of Cucumber Finley sliced.
  7. {Prepare 1/2 cup of carrots grated.
  8. {Make ready 1/2 cup of boiled corn.
  9. {Prepare 1 of tomato Finley sliced.
  10. {Take of Topping.
  11. {Make ready of Garlic sauce as required.
  12. {Make ready of Sauce samurai as required.

De keratine behandeling van Kapsalon Syl Bulut verandert droog, statisch, pluizig en weerbarstig haar in een glanzend en pluisvrij. Uw Bestelling(en) Afrekenen Pizza's Pasta's Salades Kapsalon Kleine Schotels Grote Schotels Mixed Schotels Visschotels Specialiteiten Turkse Pizza's / Durum Bakjes Burgers Hotwings en Nuggets. Pizza's Insalata Schotels Combi Schotels Kapsalon Broodjes Bakjes Turkse Pizza's Queens Menu Kipnuggets Extra's Dranken.

Steps to make Kapsalon:

  1. Cook the marinated chicken, keep aside.
  2. Make French fries frites, Keep aside. (see recipe).
  3. Cut the salad and keep aside.
  4. Take a ovenproof dish add fries in (see recipe).
  5. Make a layer of chicken (see recipe).
  6. Grat the cheese and top on frites and chicken..
  7. Preheat oven on 180°C. Place kapsalon in oven for 5 minutes, so cheese the melted. Remove kapsalon from oven..
  8. Top it with iceberg then cucumber,.
  9. Then top it with other salads, you can any thing what you like or skip what you don't like.
  10. Drizzle with sauce and serve hot.

So that's going to wrap it up with this exceptional food kapsalon recipe. Thank you very much for reading. I am sure that you can make this at home. There is gonna be interesting food at home recipes coming up. Don't forget to bookmark this page on your browser, and share it to your loved ones, colleague and friends. Thanks again for reading. Go on get cooking!

Easiest Way to Prepare Any-night-of-the-week My turkey stew

Easiest Way to Prepare Any-night-of-the-week My turkey stew

My turkey stew. This hearty turkey stew with vegetables simmered in a creamy sauce is a delicious way to use up Some of this is intentional so I can make my favorite sandwich or elevate taco night, but frankly I. The Best Turkish Stew Recipes on Yummly Pecos Red Stew, Indian Vegetable Stew, Creole-style Pork Stew.

My turkey stew It's warming, filling, and a big batch will last all week. This hearty turkey stew made with leftover turkey, bacon, leeks, carrots and potatoes is the comfort I couldn't decide whether I wanted to add cream to my turkey stew or leave it dairy free, so I've tried. Turkey breast meat and fresh vegetables are cooked up into a hearty stew that may be enjoyed any This is a great base recipe.

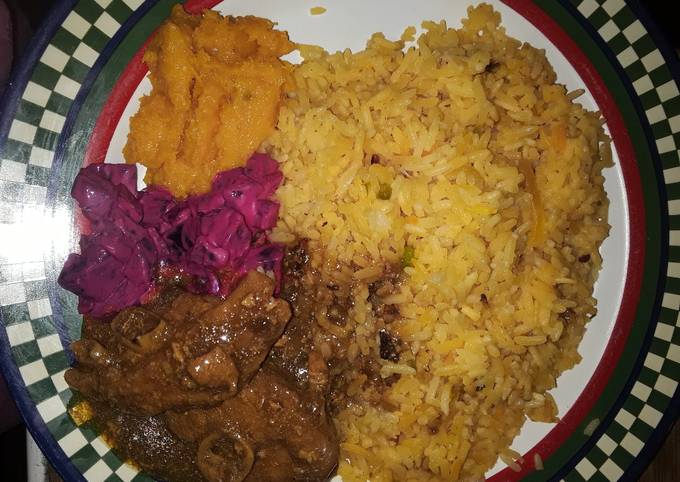
Hey everyone, it's John, welcome to our recipe page. Today, I'm gonna show you how to make a special dish, my turkey stew. It is one of my favorites. For mine, I'm gonna make it a bit unique. This will be really delicious.

My turkey stew is one of the most popular of current trending meals on earth. It's simple, it is quick, it tastes yummy. It's enjoyed by millions every day. They are nice and they look fantastic. My turkey stew is something which I've loved my entire life.

This hearty turkey stew with vegetables simmered in a creamy sauce is a delicious way to use up Some of this is intentional so I can make my favorite sandwich or elevate taco night, but frankly I. The Best Turkish Stew Recipes on Yummly Pecos Red Stew, Indian Vegetable Stew, Creole-style Pork Stew.

To begin with this recipe, we must prepare a few components. You can have my turkey stew using 9 ingredients and 6 steps. Here is how you cook it.

The ingredients needed to make My turkey stew:

  1. {Prepare 1 kg of sliced turkey leg.
  2. {Take 1 of onion halved and chopped.
  3. {Prepare 3 tbsp of olive oil.
  4. {Get of Bell peppers all halved and chopped.
  5. {Take 2 tbsp of veri peri(veri hot aftican sauce).
  6. {Get 2 tbsp of sweet chilli sauce.
  7. {Make ready 1 tbsp of Mr spices(Portuguese steak).
  8. {Get 1 tbsp of spanish smoked paprika.
  9. {Make ready 5 tbsp of Knorrox soup(Beef flavour).

It was a little bland for my taste so I added my favorite seasonings (garlic. Leftover Turkey Stew - made by roasting vegetables to bring out their natural sweetness and flavour and using leftover turkey from a special occasion dinner. This old-school turkey stew recipe from Jamie Oliver's Christmas Cookbook is a brilliant way to turn your leftovers into something incredibly Turkey stew. Sweet leek & smoky bacon biscuit dumplings.

Instructions to make My turkey stew:

  1. Turn on your stove. Place your pot and add 1 onion halved and chopped, 3 tbsp olive oil, halved and chopped bell peppers, veri peri sauce, sweet chilli sauce, Mr spices, thyme and the smoked paprika..
  2. Keep on stirring your mixture for about 5minutes max. Do not let the mixture get burned as the final will not taste good..
  3. Add your turkey, stir and add some water. Close the pot and cook for about 30 minutes and it can also be more than that if the meat is not yet cooked after 30 mins..
  4. Keep on checking your pot incase the water quickly runs out and add more water if the turkey is not cooked well..
  5. After you are satisfied with the texture of the turkey, on a small bowk mix the 5tbsps of soup with water..
  6. Add your soup on the pot. Make sure the soup is not very thick, if it is you need to add water until you are satisfied with how the soup is..

This stew recipe is perfect for your turkey leftovers. By roasting the turkey bone, it gives the stew a rich, deep, savory flavor. Filling and hearty, Turkey and Root Vegetable Stew remakes holiday leftovers into something to be With a little inspiration from my good friend and fellow healthy food blogger David Crowley from. This stewed turkey is really amazing! I make lots and lots of stews and I love all of them, but this one is one of my favorites.

So that's going to wrap it up with this special food my turkey stew recipe. Thanks so much for reading. I am confident that you can make this at home. There's gonna be more interesting food at home recipes coming up. Remember to bookmark this page on your browser, and share it to your family, friends and colleague. Thank you for reading. Go on get cooking!

Step-by-Step Guide to Make Speedy Korean fried chicken wings

Step-by-Step Guide to Make Speedy Korean fried chicken wings

Korean fried chicken wings.

Korean fried chicken wings

Hey everyone, hope you're having an amazing day today. Today, I will show you a way to make a special dish, korean fried chicken wings. It is one of my favorites food recipes. For mine, I will make it a bit tasty. This is gonna smell and look delicious.

Korean fried chicken wings is one of the most well liked of recent trending meals in the world. It is enjoyed by millions daily. It is simple, it's quick, it tastes yummy. Korean fried chicken wings is something that I've loved my entire life. They're nice and they look fantastic.

To begin with this particular recipe, we must prepare a few ingredients. You can cook korean fried chicken wings using 5 ingredients and 6 steps. Here is how you can achieve that.

The ingredients needed to make Korean fried chicken wings:

  1. {Prepare 12 of wings sectioned.
  2. {Take of My Buffalo chicken seasoning.
  3. {Get of Cornstarch.
  4. {Get 1 cup of AP flour.
  5. {Make ready of Soda water to consistency.

Steps to make Korean fried chicken wings:

  1. Start by sealing the wings with my Buffalo seasoning. Then toss the wings in corn starch and and shake the excess off. Set them on a rack in the fridge for a few hours to dry out.
  2. Set your fryer to 350.
  3. Mix the flour;1 tbsp of cornstarch and 2 tbsp Buffalo seasoning together. Add a little soda water at a time until you get a consistent that coats the back of a spoon really well. Lots of these batters out there are really watery but I like mine a little thicker..
  4. Start by dipping 6 to 8 wings into the batter and fry for 8 minutes. Remove to a wire rack and allow to rest for at least 10 minutes..
  5. When you have fried all your wings crank the temp to 375 while they rest.
  6. Add the wings back to the fryer and fry for an additional 8 minutes or until desired doneness.

So that is going to wrap it up for this special food korean fried chicken wings recipe. Thanks so much for reading. I am confident that you can make this at home. There is gonna be more interesting food at home recipes coming up. Remember to save this page in your browser, and share it to your loved ones, friends and colleague. Thanks again for reading. Go on get cooking!

Step-by-Step Guide to Make Quick Zucchini Lasagna

Step-by-Step Guide to Make Quick Zucchini Lasagna

Zucchini Lasagna.

Zucchini Lasagna

Hey everyone, it is John, welcome to my recipe page. Today, we're going to prepare a distinctive dish, zucchini lasagna. One of my favorites. This time, I will make it a little bit unique. This is gonna smell and look delicious.

Zucchini Lasagna is one of the most popular of current trending meals in the world. It is simple, it is quick, it tastes yummy. It is enjoyed by millions daily. They are nice and they look wonderful. Zucchini Lasagna is something that I've loved my whole life.

To get started with this particular recipe, we have to prepare a few components. You can cook zucchini lasagna using 9 ingredients and 6 steps. Here is how you cook that.

The ingredients needed to make Zucchini Lasagna:

  1. {Make ready 3 of large zuccihini.
  2. {Take 2 tbsp of Olive oil.
  3. {Make ready 1 can of pasta sauce (Newman’s is best bc they donate profits to charity).
  4. {Take 1 lb of ground beef or turkey (optional).
  5. {Prepare 1 container of mushrooms (optional).
  6. {Take of Cheese (optional).
  7. {Prepare of Parsley.
  8. {Get of Oregano / Italian Seasoning.
  9. {Get of Salt.

Steps to make Zucchini Lasagna:

  1. Cut zuccihini into long thin strips and salt them. Then cook them in a skillet with olive oil until browned..
  2. Cook meat & diced mushrooms in skillet.
  3. Add in marinara sauce to meat/mushrooms.
  4. Throw some oregano and parsley into the sauce/meat/mushroom mix.
  5. Make layers of sauce/meat and zucchini.
  6. Put in microwave or oven for 10 min or so.

So that's going to wrap it up with this exceptional food zucchini lasagna recipe. Thanks so much for reading. I'm confident you will make this at home. There is gonna be more interesting food in home recipes coming up. Remember to save this page on your browser, and share it to your family, friends and colleague. Thanks again for reading. Go on get cooking!

How to Make Speedy Hare Chane Aur Palak Ke Sheekh Kebab

How to Make Speedy Hare Chane Aur Palak Ke Sheekh Kebab

Hare Chane Aur Palak Ke Sheekh Kebab.

Hare Chane Aur Palak Ke Sheekh Kebab

Hello everybody, I hope you're having an amazing day today. Today, I will show you a way to make a distinctive dish, hare chane aur palak ke sheekh kebab. It is one of my favorites food recipes. This time, I will make it a bit tasty. This will be really delicious.

Hare Chane Aur Palak Ke Sheekh Kebab is one of the most favored of current trending foods in the world. It's appreciated by millions daily. It's easy, it is fast, it tastes yummy. They are fine and they look fantastic. Hare Chane Aur Palak Ke Sheekh Kebab is something which I've loved my entire life.

To get started with this recipe, we have to prepare a few components. You can have hare chane aur palak ke sheekh kebab using 16 ingredients and 6 steps. Here is how you can achieve that.

The ingredients needed to make Hare Chane Aur Palak Ke Sheekh Kebab:

  1. {Get 250 gms of green chana (if green chana is not available fresh then use the dry green chana and soak it for 8 hrs and then cook and useit).
  2. {Make ready 100 gms of cottage cheese grated.
  3. {Prepare 50 gms of roasted gram powder.
  4. {Take 150 gms of spinach Blanched and pureed.
  5. {Prepare 50 gms of fenugreek leaves chopped finely.
  6. {Make ready 50 gms of mint leaves chopped finely.
  7. {Make ready 50 gms of green garlic chopped finely (if green garlic not available then use the regular garlic paste).
  8. {Take 50 gms of coriander leaves chopped finely.
  9. {Prepare 1 tbsp of green chilli paste.
  10. {Prepare 1 tsp of tandoori masala.
  11. {Make ready 1 tsp of garam masala.
  12. {Prepare 1 tsp of chaat masala.
  13. {Get 1 tsp of dry mango powder.
  14. {Get 1 tsp of kitchen king masala.
  15. {Get 1 tbsp of kasuri methi crushed lightly with hands.
  16. {Prepare of salt as per taste.

Instructions to make Hare Chane Aur Palak Ke Sheekh Kebab:

  1. Take a bowl. Put the roasted gram powder, grated cottage cheese, green gram and spinach paste. (here i have grinded the green grams with spinach puree). Add all the dry masalas to it..
  2. Add all the fresh chopped green veggies (fenugreek, coriander, mint and green garlic) and kasuri methi (dry methi leaves). Mix them well..
  3. Apply a bit of oil on palm and take a small portion of the mixture in your hands and try to wrap thinly around the skewer..
  4. Make the others in the same way. They can be made in advance this way and kept in the fridge. just cling wrap them..
  5. Heat a non stick flat pan. Place the kebabs on it with the skewers and apply very little oil and cook them on a medium to low flame till golded and crisp..
  6. Sprinkle some chaat masala and tandoori masala on it and serve with green chutney, ketchup, beetroot and vegetable soup.

So that's going to wrap this up for this exceptional food hare chane aur palak ke sheekh kebab recipe. Thanks so much for reading. I am confident you will make this at home. There's gonna be interesting food in home recipes coming up. Remember to bookmark this page in your browser, and share it to your family, colleague and friends. Thank you for reading. Go on get cooking!

Recipe of Favorite Jenny's Crock Pot Pork Roast

Recipe of Favorite Jenny's Crock Pot Pork Roast

Jenny's Crock Pot Pork Roast.

Jenny's Crock Pot Pork Roast

Hello everybody, hope you are having an amazing day today. Today, we're going to make a distinctive dish, jenny's crock pot pork roast. It is one of my favorites. For mine, I am going to make it a bit tasty. This will be really delicious.

Jenny's Crock Pot Pork Roast is one of the most favored of current trending meals on earth. It is appreciated by millions every day. It is simple, it's fast, it tastes delicious. They're fine and they look fantastic. Jenny's Crock Pot Pork Roast is something that I have loved my entire life.

To get started with this recipe, we have to prepare a few components. You can cook jenny's crock pot pork roast using 15 ingredients and 11 steps. Here is how you can achieve that.

The ingredients needed to make Jenny's Crock Pot Pork Roast:

  1. {Get 2 1/2 lb of Pork Tenderloin.
  2. {Take 12 oz of Carrots (Peeled and cut into 2 to 3 in. pieces).
  3. {Make ready 32 oz of Gold or New Potatoes (Quartered)(@6-8 Gold Potatoes).
  4. {Prepare 12 oz of Onion.
  5. {Prepare 5-6 Cups of Water or Broth.
  6. {Prepare 7 grams of Lipton Onion Soup Mix (1 Packet).
  7. {Take 4 tsp of Chicken Bouillon.
  8. {Make ready 3 clove of Garlic (Minced).
  9. {Make ready 1 of medium Bay Leaf.
  10. {Prepare 2 tbsp of Olive Oil.
  11. {Take 1 tsp of Dried Thyme Leaves.
  12. {Make ready 1 tsp of Garlic Powder.
  13. {Get 1 tsp of Dried Parsley.
  14. {Get 1 tsp of Salt.
  15. {Prepare 1 tsp of Black Pepper.

Instructions to make Jenny's Crock Pot Pork Roast:

  1. Wash and prepare vegetables. Set aside..
  2. Preheat Olive Oil in a non-stick skillet to Medium/High heat..
  3. Season Pork Tenderloin with Garlic Powder, Salt, Pepper, and Dried Parsley..
  4. Brown Pork in skillet. Be sure to brown all sides of the tenderloin..
  5. Layer the Vegetables in a Large Crock Pot..
  6. Place Browned Tenderloin on the Vegetables..
  7. Sprinkle Lipton Onion Soup Mix over the Pork & Vegetables..
  8. Add Minced Garlic Clove, Thyme, Chicken Bouillon, and Bay Leaf..
  9. Pour the 5 cups of Water in Crock Pot, and cover..
  10. Cook on Low for 8 to 10 hours, or until Pork falls apart and Vegetables are cooked..
  11. If you desire more of a gravy, you can add a couple Tbsp of flour to the cooking liquid, before adding it in..

So that is going to wrap this up for this exceptional food jenny's crock pot pork roast recipe. Thanks so much for your time. I'm confident that you can make this at home. There is gonna be more interesting food in home recipes coming up. Don't forget to bookmark this page on your browser, and share it to your family, colleague and friends. Thank you for reading. Go on get cooking!

Easiest Way to Prepare Any-night-of-the-week Fig & spices cake

Easiest Way to Prepare Any-night-of-the-week Fig & spices cake

Fig & spices cake. Two candidates to run for FIG Presidency. The International Gymnastics Federation (French: Fédération Internationale de Gymnastique, FIG) is the governing body of competitive gymnastics. Its headquarters is in Lausanne, Switzerland.

Fig & spices cake Welcome to the photo archive of the International Gymnastics Federation (FIG). Here you will find our image archive sorted into categories. If you have any questions or need assistance finding a certain.

Hey everyone, hope you're having an amazing day today. Today, I'm gonna show you how to make a special dish, fig & spices cake. It is one of my favorites. This time, I'm gonna make it a bit unique. This will be really delicious.

Two candidates to run for FIG Presidency. The International Gymnastics Federation (French: Fédération Internationale de Gymnastique, FIG) is the governing body of competitive gymnastics. Its headquarters is in Lausanne, Switzerland.

Fig & spices cake is one of the most favored of current trending meals on earth. It is appreciated by millions daily. It's easy, it's quick, it tastes yummy. They are nice and they look fantastic. Fig & spices cake is something that I've loved my entire life.

To get started with this particular recipe, we must prepare a few ingredients. You can cook fig & spices cake using 12 ingredients and 5 steps. Here is how you cook that.

The ingredients needed to make Fig & spices cake:

  1. {Get 1 cup of raw natural almond.
  2. {Take 1/4 cup of self raising flour.
  3. {Prepare 1 pinch of salt.
  4. {Take 1 tsp of ginger.
  5. {Prepare 1/2 tsp of nutmeg.
  6. {Make ready 1/2 tsp of cinnamon.
  7. {Take 3/4 cup of granulated sugar±2 tbsp extra for sprinkle on top cake.
  8. {Take 3 tbsp of honey.
  9. {Take 1 tsp of lemon juice±1/2 tsp lemond rind.
  10. {Make ready 14 pcs of fresh or frozen figs.
  11. {Get 3 of large eggs beaten.
  12. {Make ready 4 tbsp of canola/sun flower oil.

From Middle English fige, fygge (also fyke, from Old English fīc, see fike), borrowed from Anglo-Norman figue, borrowed from Old French figue, from Old Occitan figa, from Vulgar Latin *fīca ("fig"), from Latin fīcus ("fig tree"), from a pre-Indo European language, perhaps Phoenician. Fig, plant of the mulberry family (Moraceae) and its edible fruit. The common fig is indigenous to an area extending from Asiatic Turkey to northern India and is cultivated in warm climates. What does FIG abbreviation stand for?

Instructions to make Fig & spices cake:

  1. Heat oven to 180 degrees. Butter a 9-inch fluted tart pan or pie pan; set aside..
  2. Put almonds and 3/4 cup sugar in a food processor and grind to a coarse powder. Add self raising flour, ginger cinnamon,nutmeg and salt; pulse to combine..
  3. In a mixing bowl, whisk together eggs, canola/sun flower oil, honey and lemon juice. Add lemond rind.
  4. Add almond mixture and beat for a minute until batter is just mixed. Pour batter into pan.Remove stem from each fig and cut in half. Arrange fig halves cut-side up over the batter. Sprinkle figs with extra 2 tbsp sugar.
  5. Bake for 35 minutes,or until golden outside and dry at center. Cool before serving.serve with vanila ice cream or cream.

Can't believe why hasn't existed Add Fig to your terminal. Fig is still in beta while we iron out the remaining kinks, but. Build better products as a team. Design, prototype, and gather feedback all in one place with Figma.

So that's going to wrap this up for this exceptional food fig & spices cake recipe. Thanks so much for reading. I'm confident that you can make this at home. There is gonna be more interesting food at home recipes coming up. Don't forget to bookmark this page in your browser, and share it to your family, friends and colleague. Thank you for reading. Go on get cooking!

How to Prepare Homemade Japanese Matcha Swiss Roll Cake

How to Prepare Homemade Japanese Matcha Swiss Roll Cake

Japanese Matcha Swiss Roll Cake.

Japanese Matcha Swiss Roll Cake

Hey everyone, hope you're having an amazing day today. Today, I will show you a way to make a special dish, japanese matcha swiss roll cake. It is one of my favorites food recipes. For mine, I am going to make it a bit unique. This is gonna smell and look delicious.

Japanese Matcha Swiss Roll Cake is one of the most well liked of recent trending meals on earth. It is easy, it is quick, it tastes delicious. It is enjoyed by millions every day. They are nice and they look fantastic. Japanese Matcha Swiss Roll Cake is something that I have loved my whole life.

To begin with this recipe, we have to first prepare a few ingredients. You can cook japanese matcha swiss roll cake using 9 ingredients and 17 steps. Here is how you can achieve that.

The ingredients needed to make Japanese Matcha Swiss Roll Cake:

  1. {Take of Sponge Cake.
  2. {Make ready 4 of large eggs.
  3. {Make ready 80 g of granulated sugar.
  4. {Prepare 60 g of cake flour.
  5. {Make ready 5 g of matcha powder.
  6. {Get 2 tbsp of milk.
  7. {Prepare of Whipped Cream.
  8. {Take 10 g of granulated sugar.
  9. {Get 200 ml of heavy cream.

Steps to make Japanese Matcha Swiss Roll Cake:

  1. Preheat the oven to 350F.
  2. Line a parchment paper.
  3. Heat water in a large pot (ensure that your pot is big enough to place your mixing bowl in) over the stove. Remove the pot from the stove right before the water starts simmering.
  4. Put the eggs and sugar in the mixing bowl. Place the mixing bowl over the pot and start beating it using an electric hand whisk. When the mixture reaches body temperature, remove it from the pot and continue beating the mixture until it reaches a soft peak..
  5. Microwave the milk for 5-10 seconds to warm it up a bit.
  6. Put the milk inside the mixture and hand whisk it until blended.
  7. Sift half the matcha powder and the flour into the mixing bowl and hand whisk until well combined. Repeat with the rest of the flour and matcha powder. Make sure it's well combined..
  8. Pour the mixture into your baking pan. If there are air bubbles in your baking mixture, drop the pan to release the bubbles. Make sure the batter is evenly spread across the pan..
  9. Bake the cake for about 10-12 minutes. Check the cake around 10 min, make sure the bottom doesn't overcook. The top should spring back softly..
  10. While the cake is baking, you can start making the whipped cream.
  11. Place the sugar, and heavy cream into a bowl. Whip the ingredients together with an electric hand whisk until it reaches stiff peaks. Leave it aside.
  12. Once the cake is done, remove it and drop it once again so that the cake does not shrink. Set the cake aside to cool down a bit but not completely cool because it will be difficult to roll. You need to roll the cake while it is still warm or else it will crack..
  13. Flip the cake while it is still warm by placing a parchment paper and a baking tray on top and then flipping it over. Gently peel off the parchment paper..
  14. While the cake is still warm, carefully roll the cake with the parchment paper and then set aside for it to cool down to room temperature. Make sure it cools down completely before applying the whipped cream or else the cream will melt..
  15. After the cake is cooled, spread the whipped cream on the cake. Make sure to spread the cream thinner near the end of the cake and thicker near the beginning so that the cream doesn't spill over when it gets rolled up again..
  16. Carefully re-roll the cake with the cream tightly with parchment paper and plastic wrap..
  17. Place the cake in the fridge for at least an hour to chill before serving.

So that is going to wrap it up for this special food japanese matcha swiss roll cake recipe. Thank you very much for your time. I am confident you can make this at home. There is gonna be more interesting food in home recipes coming up. Remember to save this page in your browser, and share it to your loved ones, colleague and friends. Thank you for reading. Go on get cooking!

Steps to Prepare Any-night-of-the-week NIKUJAGA (Meat and Potato Stew)

Steps to Prepare Any-night-of-the-week NIKUJAGA (Meat and Potato Stew)

NIKUJAGA (Meat and Potato Stew).

NIKUJAGA (Meat and Potato Stew)

Hey everyone, it's Brad, welcome to our recipe page. Today, we're going to make a special dish, nikujaga (meat and potato stew). One of my favorites food recipes. For mine, I'm gonna make it a little bit tasty. This will be really delicious.

NIKUJAGA (Meat and Potato Stew) is one of the most well liked of recent trending foods in the world. It is appreciated by millions daily. It is easy, it's quick, it tastes yummy. NIKUJAGA (Meat and Potato Stew) is something that I have loved my whole life. They're nice and they look wonderful.

To begin with this recipe, we have to prepare a few ingredients. You can have nikujaga (meat and potato stew) using 13 ingredients and 7 steps. Here is how you can achieve it.

The ingredients needed to make NIKUJAGA (Meat and Potato Stew):

  1. {Make ready 150 of g(5.3oz-) Sliced Beef.
  2. {Make ready 4-5 of Potato.
  3. {Prepare 1/2 of Carrot.
  4. {Prepare 1 of Onion.
  5. {Make ready 8 of Green beans.
  6. {Prepare 150 of g(5.3oz) SHIRATAKI (konjac noodles).
  7. {Make ready 2 TBSP of Salad Oil.
  8. {Take 400 ml of (about 13 and 1/3oz) Water.
  9. {Take 10 cm of KONBU.
  10. {Take Handful of KATUOBUSHI Bonito Flakes.
  11. {Get 5 tbsp of Soy sauce.
  12. {Make ready 4 tbsp of Sugar.
  13. {Make ready 3 tbsp of mirin.

Steps to make NIKUJAGA (Meat and Potato Stew):

  1. First of all. To prepare the SHIRATAKI, Rinse and drain well. and Boil for 3 minutes, drain and cut into easy to eat length. set aside..
  2. To make the DASHI soup stock, Put Water and KONBU in a Pot, and Boil it. Remove from the heat. Add KATSUOBUSHI Bonito Flakes. Strain the DASHI soup stock through a Strainer..
  3. Cut Potato into 4-6 pieces and soak in water. Cut carrots in rolling edges. Cut Onion into 1 cm slices. Cut Green beans into 5cm. and Cut Beef into about 5cm..
  4. In a Large Pot, Stir-fry the beef with salad oil until no longer red. Add Potato, Carrot, Onion and Stir-fry until translucent at the potato edges..
  5. Add the DASHI soup stock. Bring to a boil over low-medium heat. Skim off any foamy scum. Add Soy sauce, Sugar, MIRIN. Simmer for about 15 minutes until vegetables are tender..
  6. Add SHIRATAKI and Green beans. Simmer for about 5 minutes..
  7. Now, It's ready to be served!! Note: NIKUJAGA tastes better the next day too..

So that's going to wrap this up for this special food nikujaga (meat and potato stew) recipe. Thanks so much for reading. I am confident that you will make this at home. There's gonna be interesting food in home recipes coming up. Don't forget to bookmark this page in your browser, and share it to your family, colleague and friends. Thanks again for reading. Go on get cooking!

Steps to Make Super Quick Homemade Chilli chicken

Steps to Make Super Quick Homemade Chilli chicken

Chilli chicken.

Chilli chicken

Hello everybody, it's Louise, welcome to our recipe page. Today, I'm gonna show you how to prepare a distinctive dish, chilli chicken. It is one of my favorites. For mine, I will make it a bit unique. This will be really delicious.

Chilli chicken is one of the most popular of recent trending foods in the world. It's appreciated by millions every day. It's simple, it's fast, it tastes yummy. They are nice and they look fantastic. Chilli chicken is something which I've loved my entire life.

To begin with this particular recipe, we have to prepare a few components. You can cook chilli chicken using 24 ingredients and 16 steps. Here is how you cook it.

The ingredients needed to make Chilli chicken:

  1. {Take 1 of . Boneless chicken - 250gm.
  2. {Take 2 of . Big onion - 1 minced.
  3. {Prepare 3 of . Big onion - 1 cubed.
  4. {Take 4 of . Ginger - 1 tbspn.
  5. {Prepare 5 of . Garlic - 1 and half tbspn.
  6. {Make ready 6 of . Green chilli - 3 or 4 chopped.
  7. {Get 7 of . Capsicum - 1/4 of 1 medium.
  8. {Prepare 8 of . Oil for frying.
  9. {Take 9 of . Sesame oil - 1 tspn.
  10. {Take 10 of . Pepper powder - 1/4 tspn.
  11. {Get 11 of . Soya sauce - 2 and half tbspn.
  12. {Take 12 of . Tomato ketchup - 1 and half tbspn.
  13. {Take 13 of . Vinegar - 1/2 tspn.
  14. {Take 14 of . Sugar - 1/2 tspn.
  15. {Make ready 15 of . Salt.
  16. {Get 16 of . Red chilli paste - 1 tspn.
  17. {Make ready of for marination.
  18. {Prepare 1 of . All purpose flour - 1 tbspn.
  19. {Take 2 of . Cornflour - 2 tbspn.
  20. {Take 3 of . Soya sauce - 2 tbspn.
  21. {Take 4 of . Pepper powder - 1 tbspn.
  22. {Prepare 5 of . Vinegar - 1/2 tspn.
  23. {Get 6 of . Egg - 1.
  24. {Make ready 7 of . Salt.

Steps to make Chilli chicken:

  1. Wash the chicken thoroughly with salt and vinegar..
  2. Cut them into small cubes..
  3. Again wash them and drain them for 10 minutes..
  4. Take a bowl and add all purpose flour, corn flour, soya sauce, pepper powder, vinegar, egg and salt..
  5. Mix well and add very little amount of water..
  6. Marinate the chicken pieces with this paste and keep aside for at least 30 minutes..
  7. Then shallow fry the chicken pieces for about 5 minutes on low flame..
  8. Drain the fried chicken pieces in kitchen tissue and keep aside..
  9. Now heat 1 tbspn of oil, use the same oil we used for frying the chicken..
  10. To this add minced ginger and garlic. Saute for a seconds on high flame. Be very careful while sauting them. There is a chance of getting burn. So stir continuously..
  11. To this add minced onion, Green chilli. Saute until they become light golden in colour.Reduce the heat.
  12. To this add soya sauce, Red chilli paste, tomato ketchup, salt, vinegar and sugar. Mix well..
  13. If you want your chicken to be saucy then add some hot water and boil well. If you want the chicken to be very dry, then no need of adding water..
  14. Check the sauce and adjust the sauce according to your taste buds..
  15. Then add fried chicken, cubed onion and capsicum..
  16. Mix well and cook until the chicken is well coated with sauce. Finally sprinkle pepper powder and sesame oil. Add chopped coriander leaves.  Serve hot..

So that's going to wrap this up for this exceptional food chilli chicken recipe. Thanks so much for your time. I'm confident that you will make this at home. There is gonna be more interesting food at home recipes coming up. Don't forget to bookmark this page on your browser, and share it to your family, friends and colleague. Thank you for reading. Go on get cooking!

Recipe of Perfect Mutton Harees / Hareesa

Recipe of Perfect Mutton Harees / Hareesa

Mutton Harees / Hareesa.

Mutton Harees / Hareesa

Hello everybody, I hope you're having an amazing day today. Today, I'm gonna show you how to make a special dish, mutton harees / hareesa. One of my favorites. For mine, I'm gonna make it a little bit unique. This will be really delicious.

Mutton Harees / Hareesa is one of the most well liked of recent trending meals on earth. It is appreciated by millions every day. It's easy, it's fast, it tastes yummy. They're nice and they look fantastic. Mutton Harees / Hareesa is something that I've loved my whole life.

To begin with this particular recipe, we must prepare a few ingredients. You can cook mutton harees / hareesa using 19 ingredients and 7 steps. Here is how you can achieve that.

The ingredients needed to make Mutton Harees / Hareesa:

  1. {Get 1 cup of whole wheat.
  2. {Prepare 1 cup of barley.
  3. {Prepare 1/2 kg of mutton with bone.
  4. {Take 1 inch of cinnamon.
  5. {Take 4 of cardamom.
  6. {Prepare 1 of black cardamom.
  7. {Take 6 of Cloves.
  8. {Take Few of pepper corns.
  9. {Get 1 of star anise.
  10. {Take 1 of maze.
  11. {Take 1/2 tsp of fennel seeds.
  12. {Make ready 1 tsp of cumin seeds.
  13. {Take 1 tbsp of ginger garlic green chilli paste.
  14. {Prepare as needed of Salt.
  15. {Make ready 1 glass of water.
  16. {Get 2 of bay leaves.
  17. {Get 1 tbsp of oil.
  18. {Get 1 tsp of lemon juice.
  19. {Make ready 1 tbsp of olive oil.

Steps to make Mutton Harees / Hareesa:

  1. Soak barley and wheat over night. Take mutton with bone as bone adds more flavour,but more of fleshy pieces..
  2. Take whole spices and lightly roast it and grind it. Add mutton to the pressure cooker and add ginger garlic and green chilli paste..
  3. Add 3/4 of ground masala,salt and 1 glass water..
  4. Add bay leaves and then cook it till done. Almost for 4 to 5 whistles. When done keep aside. In the same cooker add the wheat +barley and add double amount of water,salt and oil and cover and cook for 4 whistles. When cooler coarsely pulse the cooked wheat in grinder..
  5. Add the grinded wheat in the cooker along with strained mutton stock. Shree the mutton pieces from bone and discard the bones. Add the mutton to harees and mix well..
  6. In another vessel heat olive oil and add the remaining grounded mix and when nice aroma comes add to the hadees and cook for 5 mins..
  7. Mutton harees is ready. Top it with fried onions and enjoy..

So that's going to wrap this up with this exceptional food mutton harees / hareesa recipe. Thanks so much for your time. I'm sure you will make this at home. There is gonna be more interesting food at home recipes coming up. Don't forget to bookmark this page in your browser, and share it to your loved ones, friends and colleague. Thank you for reading. Go on get cooking!

How to Make Ultimate Honey Brown Sugar Pulled Pork (crockpot)

How to Make Ultimate Honey Brown Sugar Pulled Pork (crockpot)

Honey Brown Sugar Pulled Pork (crockpot).

Honey Brown Sugar Pulled Pork (crockpot)

Hello everybody, I hope you are having an amazing day today. Today, I'm gonna show you how to prepare a distinctive dish, honey brown sugar pulled pork (crockpot). One of my favorites food recipes. This time, I'm gonna make it a little bit unique. This will be really delicious.

Honey Brown Sugar Pulled Pork (crockpot) is one of the most well liked of recent trending meals on earth. It is simple, it is quick, it tastes yummy. It's appreciated by millions every day. Honey Brown Sugar Pulled Pork (crockpot) is something which I have loved my entire life. They're nice and they look fantastic.

To begin with this particular recipe, we have to prepare a few ingredients. You can have honey brown sugar pulled pork (crockpot) using 9 ingredients and 6 steps. Here is how you cook that.

The ingredients needed to make Honey Brown Sugar Pulled Pork (crockpot):

  1. {Get 4 lb of boneless pork loin roast.
  2. {Prepare 2 cup of brown sugar bbq sauce.
  3. {Prepare 1/2 cup of honey.
  4. {Make ready 1/3 cup of packed brown sugar.
  5. {Make ready 2 can of cola; vanilla coke is especially yummy.
  6. {Get 1 tsp of garlic salt.
  7. {Get 1/2 tsp of onion powder.
  8. {Get 1 tsp of yellow mustard.
  9. {Get 1 of small onion.

Instructions to make Honey Brown Sugar Pulled Pork (crockpot):

  1. Pour half of cola in crockpot, add roast. sprinkle with garlic salt and add onion, cut in half.
  2. In medium bowl, mix all other ingredients and pour over roast.
  3. Cover. cook on low approximately 4 hours.
  4. Remove meat and shred with two forks. return to slow cooker and cover..
  5. Switch to high and cook approximately 1 hour, til hot and bubbly. if sauce is too thin for your liking, you can add a little cornstarch to thicken or reduce in saucepan..
  6. Serve on rolls or over mashed potatoes. enjoy!.

So that is going to wrap it up for this special food honey brown sugar pulled pork (crockpot) recipe. Thank you very much for reading. I'm confident you will make this at home. There is gonna be interesting food in home recipes coming up. Remember to save this page on your browser, and share it to your loved ones, colleague and friends. Thank you for reading. Go on get cooking!

Recipe of Ultimate Rice dessert - kalamra

Recipe of Ultimate Rice dessert - kalamra

Rice dessert - kalamra.

Rice dessert - kalamra

Hello everybody, it is Jim, welcome to my recipe page. Today, I'm gonna show you how to make a special dish, rice dessert - kalamra. One of my favorites food recipes. This time, I am going to make it a little bit tasty. This is gonna smell and look delicious.

Rice dessert - kalamra is one of the most well liked of recent trending meals on earth. It's easy, it's fast, it tastes yummy. It's enjoyed by millions daily. They're nice and they look fantastic. Rice dessert - kalamra is something that I have loved my entire life.

To get started with this particular recipe, we have to prepare a few ingredients. You can have rice dessert - kalamra using 10 ingredients and 2 steps. Here is how you can achieve it.

The ingredients needed to make Rice dessert - kalamra:

  1. {Prepare 3 cup of rice.
  2. {Make ready 3 cup of curd.
  3. {Prepare 1/2 cup of icing sugar.
  4. {Make ready 2 tbspn of kishmish.
  5. {Get 1 tbspn of chalori.
  6. {Take Pinch of cardamom powder.
  7. {Prepare 1/2 cup of milk.
  8. {Take 2-3 tbspn of almonds and pista chopped.
  9. {Prepare 1 of pomogranate.
  10. {Get 1 tbspn of desiccated coconut.

Steps to make Rice dessert - kalamra:

  1. Soak the rice in water for half an hour then boil the rice in water till its cooked completely, now drain the water and take out the rice in a vessel, add little milk (i added little evapourated milk to the nrml milk) to it and blend it to smooth, then add kishmish,pinch of cardamom powder,chalori,icing sugar or normal sugar mix it well! Make sure the rice is cooled completly then add the curd and mix it..the mixture is ready.
  2. Now take a serving bowl add this rice mixture to it, garnish with desiccated coconut, chopped almond and pistashios and pomogranate serve chill! Ready.

So that's going to wrap this up for this special food rice dessert - kalamra recipe. Thank you very much for reading. I am sure that you will make this at home. There's gonna be interesting food in home recipes coming up. Remember to bookmark this page in your browser, and share it to your loved ones, friends and colleague. Thank you for reading. Go on get cooking!

Simple Way to Make Any-night-of-the-week Chicken Bacon Ranch Pasta

Simple Way to Make Any-night-of-the-week Chicken Bacon Ranch Pasta

Chicken Bacon Ranch Pasta.

Chicken Bacon Ranch Pasta

Hello everybody, hope you're having an incredible day today. Today, we're going to make a distinctive dish, chicken bacon ranch pasta. It is one of my favorites. For mine, I am going to make it a bit tasty. This is gonna smell and look delicious.

Chicken Bacon Ranch Pasta is one of the most popular of recent trending meals on earth. It's enjoyed by millions every day. It's simple, it's quick, it tastes delicious. Chicken Bacon Ranch Pasta is something which I've loved my entire life. They're fine and they look wonderful.

To get started with this recipe, we must prepare a few ingredients. You can cook chicken bacon ranch pasta using 9 ingredients and 6 steps. Here is how you can achieve that.

The ingredients needed to make Chicken Bacon Ranch Pasta:

  1. {Take 16 oz of Penne pasta.
  2. {Prepare 2 cup of Cooked chicken, chopped.
  3. {Get 3/4 cup of Cooked bacon, crumbled.
  4. {Prepare 1/4 cup of Butter.
  5. {Prepare 1/4 cup of Flour.
  6. {Get 2 cup of Milk.
  7. {Take 1 tsp of Garlic salt.
  8. {Prepare 1/3 cup of Ranch dressing.
  9. {Get 3/4 cup of Shredded cheese.

Steps to make Chicken Bacon Ranch Pasta:

  1. Cook pasta. Drain. Add a little olive oil after pasta is drained so noodles don't stick together..
  2. Toss in cooked and chopped chicken, and crumbled bacon into pasta..
  3. To make ranch Alfredo sauce: melt butter in saucepan, add flour and stir to combine. Once you have your roux, add milk stir constantly until sauce thickens. Remove from heat and stir in garlic salt and ranch dressing until well combined..
  4. Pour ranch Alfredo over pasta, chicken and bacon. Stir to evenly combine..
  5. Add in shredded cheese and stir to combine..
  6. Pour into a casserole pan and bake at 350°F for 15 minutes..

So that is going to wrap it up for this special food chicken bacon ranch pasta recipe. Thanks so much for reading. I am confident that you can make this at home. There's gonna be more interesting food in home recipes coming up. Don't forget to save this page on your browser, and share it to your family, friends and colleague. Thanks again for reading. Go on get cooking!

Step-by-Step Guide to Make Super Quick Homemade Crispy Hare Matar Kabab

Step-by-Step Guide to Make Super Quick Homemade Crispy Hare Matar Kabab

Crispy Hare Matar Kabab.

Crispy Hare Matar Kabab

Hey everyone, hope you're having an amazing day today. Today, I will show you a way to make a special dish, crispy hare matar kabab. It is one of my favorites food recipes. For mine, I am going to make it a bit unique. This is gonna smell and look delicious.

Crispy Hare Matar Kabab is one of the most favored of recent trending foods in the world. It is easy, it's fast, it tastes delicious. It is enjoyed by millions every day. Crispy Hare Matar Kabab is something which I have loved my whole life. They are fine and they look wonderful.

To get started with this recipe, we have to first prepare a few components. You can cook crispy hare matar kabab using 7 ingredients and 6 steps. Here is how you can achieve it.

The ingredients needed to make Crispy Hare Matar Kabab:

  1. {Get 1 cup of fresh green peas.
  2. {Make ready 1 teaspoon of chaat masala.
  3. {Prepare to taste of salt.
  4. {Prepare 1 teaspoon of Chilli flakes.
  5. {Get 5 of bread slices.
  6. {Make ready 1 teaspoon of garam masala powder.
  7. {Prepare as needed of Oil for frying.

Steps to make Crispy Hare Matar Kabab:

  1. First of all take bread slices and blend them in a mixer and make bread crumb. As well as take green green peas and also grind them. while making this Kabab you have to use fresh matar not frozen matar. Fresh matar make this recipe perfect..
  2. In a mixing bowl take blended matar and all dry spices that is chat masala, salt, Chilli flakes and garam masala powder mix it well. Now add bread crumb and mix it nicely.
  3. Breadcrumb make matar snack more delicious. And also give binding to matar snacks. As well as your kebab will not crumble or crack while frying. Make a nice and soft dough of all the ingredient..
  4. Now apply some oil on your hands and as well as on base. Flatten the dough evenly on base. For cutting Kabab perfectly used biscuit cutter, Katori as per your choice. Apply oil on biscuit cutter and cut your snack.
  5. Now for frying the snacks heat oil in pan and put snacks in it one by one. When oil is get heated fry snack on medium high flame. Fried them from both the side. When snakes change into golden brown then remove it from pan. Now our matar snack is ready. You can serve this matter snack with tomato ketchup or tea..
  6. This snack required very few ingredients and also less time. This matar Kabab is very good for carrying in picnic. It is also good for health and good for taste. Make this matar snacks for picnic and enjoy. This matar snacks next stay fresh up to 2 days..

So that is going to wrap it up for this special food crispy hare matar kabab recipe. Thank you very much for your time. I'm sure you can make this at home. There's gonna be interesting food at home recipes coming up. Remember to bookmark this page on your browser, and share it to your loved ones, colleague and friends. Thank you for reading. Go on get cooking!

Easiest Way to Prepare Speedy Decorated Sushi Rolls: Snowmen Nori Rolls

Easiest Way to Prepare Speedy Decorated Sushi Rolls: Snowmen Nori Rolls

Decorated Sushi Rolls: Snowmen Nori Rolls.

Decorated Sushi Rolls: Snowmen Nori Rolls

Hey everyone, it's Jim, welcome to my recipe page. Today, I will show you a way to make a special dish, decorated sushi rolls: snowmen nori rolls. It is one of my favorites. For mine, I'm gonna make it a little bit unique. This is gonna smell and look delicious.

Decorated Sushi Rolls: Snowmen Nori Rolls is one of the most popular of current trending meals in the world. It's enjoyed by millions daily. It is simple, it's quick, it tastes yummy. Decorated Sushi Rolls: Snowmen Nori Rolls is something which I have loved my whole life. They're nice and they look wonderful.

To begin with this particular recipe, we have to first prepare a few ingredients. You can have decorated sushi rolls: snowmen nori rolls using 5 ingredients and 20 steps. Here is how you can achieve that.

The ingredients needed to make Decorated Sushi Rolls: Snowmen Nori Rolls:

  1. {Make ready 3 of Nori seaweed (halved sheets).
  2. {Make ready 270 grams of Sushi rice.
  3. {Take 1 of Egg.
  4. {Make ready 8 of seeds Black sesame seeds.
  5. {Get 1 slice of Ham.

Steps to make Decorated Sushi Rolls: Snowmen Nori Rolls:

  1. Make a tamagoyaki rolled omelet about 1 cm thick..
  2. Slice lengthwise into 1 cm strips..
  3. Cut the halved nori sheets into thirds..
  4. Roll up one sheet with the cut tamagoyaki..
  5. This is the snowmen's hat..
  6. Spread 60 g of sushi rice on a quartered sheet of nori..
  7. Roll it up. Now you have the body section for the snowmen..
  8. Spread 30 g of sushi rice on one piece of a halved nori sheet that has been cut into thirds..
  9. This is the face section for the snowmen..
  10. Glue the halved and quartered sheets together, using grains of rice..
  11. Spread 30 g of rice in the middle, lay the hat roll on top, followed by the face roll on top of that. Pack 30 g of rice to each side..
  12. Lay the body roll on top, and pack each side with 30 g of rice. Add another 30 g of rice on top and make sure that the rolls are completely enclosed in a layer of rice..
  13. Use a sushi mat to roll firmly..
  14. Once the roll is formed, cut into 4 slices..
  15. No matter where you cut the roll, it should reveal a snowman..
  16. Use a nori punch to cut out the mouth. Cut out the hands using scissors. Cut the buttons and cheeks out of ham using a small circular cutter..
  17. Use the black sesame seeds for eyes, and stick on the cheeks and buttons..
  18. Your snowmen sushi rolls are done..
  19. I made a Shinkansen (bullet train) version..
  20. I made the Iga city (Shiga prefecture) mascot character..

So that is going to wrap it up for this exceptional food decorated sushi rolls: snowmen nori rolls recipe. Thanks so much for reading. I'm confident you can make this at home. There is gonna be interesting food in home recipes coming up. Don't forget to save this page on your browser, and share it to your family, friends and colleague. Thanks again for reading. Go on get cooking!

How to Make Speedy Fusilli pasta in red sauce with herbed pesto bread

How to Make Speedy Fusilli pasta in red sauce with herbed pesto bread

Fusilli pasta in red sauce with herbed pesto bread. #redsaucepasta #pastarecipeIn this video learn to make fusilli pasta in marinara sauce. It is a red sauce pasta recipe. Fusilli Pasta with Zucchini Pesto Sauce and Vesuvius Cherry Tomatoes and HazelnutsL'Antro dell'Alchimista.

Fusilli pasta in red sauce with herbed pesto bread You will be surprised to know that the pink sauce gets its colour not from beetroot or. Pasta is one of those dishes that can please even the fussiest of the kids. If you kid loves pasta, then here is a quick pasta recipe with red sauce and cheese.

Hey everyone, I hope you are having an incredible day today. Today, I'm gonna show you how to make a special dish, fusilli pasta in red sauce with herbed pesto bread. One of my favorites. For mine, I will make it a little bit tasty. This will be really delicious.

#redsaucepasta #pastarecipeIn this video learn to make fusilli pasta in marinara sauce. It is a red sauce pasta recipe. Fusilli Pasta with Zucchini Pesto Sauce and Vesuvius Cherry Tomatoes and HazelnutsL'Antro dell'Alchimista.

Fusilli pasta in red sauce with herbed pesto bread is one of the most well liked of current trending meals on earth. It's enjoyed by millions daily. It is simple, it is quick, it tastes yummy. Fusilli pasta in red sauce with herbed pesto bread is something which I have loved my entire life. They're nice and they look wonderful.

To get started with this recipe, we have to first prepare a few components. You can have fusilli pasta in red sauce with herbed pesto bread using 27 ingredients and 8 steps. Here is how you cook it.

The ingredients needed to make Fusilli pasta in red sauce with herbed pesto bread:

  1. {Prepare 4 cups of Fusilli pasta.
  2. {Prepare 1 cup of tomato sauce.
  3. {Take 2 tbsp of butter.
  4. {Get 3 tbsp of olive oil.
  5. {Prepare 2 tbsp of all-purpose flour.
  6. {Make ready 1 cup of milk.
  7. {Make ready 2 tsp of black pepper powder.
  8. {Make ready to taste of salt.
  9. {Make ready 2 tsp of mixed herbs seasoning.
  10. {Take 1 cup of fresh cream.
  11. {Make ready 1 tbsp of chilli flakes.
  12. {Get 1 tsp of sugar.
  13. {Prepare 3-4 of garlic cloves chopped.
  14. {Get 2 cubes of grated cheese.
  15. {Make ready of for pesto sauce : (blend the following in a food processor until smooth paste) 2 cups fresh basil leaves.
  16. {Prepare 1/2 cup of grated Parmesan cheese.
  17. {Prepare 1/2 cup of walnut nuts toasted.
  18. {Make ready 4 of garlic cloves chopped.
  19. {Make ready 1 tsp of salt.
  20. {Prepare 1 cup of olive oil.
  21. {Take 1 tsp of black pepper powder.
  22. {Get of for bread :- warm water.
  23. {Get 1 tsp of Active Dry Yeast.
  24. {Get 1 tsp of Sugar.
  25. {Prepare 2 tsp of vegetable oil.
  26. {Get 1 tsp of salt.
  27. {Prepare 4 cups of flour.

The pasta should be well coated with the sauce. Spirals of fusilli are perfect for holding onto rich and creamy sauces. This versatile pasta tastes great in pasta bakes, salads or one-pan dishes. From Red sauce pasta, White sauce pasta, Basil Pesto sauce pasta, there are many types of Pasta recipes that you can make at home.

Instructions to make Fusilli pasta in red sauce with herbed pesto bread:

  1. For fusilli pasta: boil the fusilli pasta according to packet instructions. strain in a colander & keep aside..
  2. In a deep pan/wok heat olive oil. add the butter & garlic. saute forfew minutes. add flour & saute until light golden. gradually add the milk on low heat & cook until sauce thickens..
  3. Add salt, pepper, mixed herbs seasoning, fresh cream, tomato sauce, sugar & simmer on low heat. add the boiled fusiili pasta & give a nice gentle toss. cook on medium heat for 5-6 minutes or until done. add grated cheese &stir well..
  4. For pesto bread : : In a large bowl, stir the warm water, yeast & sugar together. Set aside for about 10 minutes, the mixture will become creamy. To the yeast mixture, add the oil, salt and 2 cups ofthe flour..
  5. Stir in the remaining flour, 1/2 cups at a time, until the dough has pulled away from the sides ofthe bowl Turn outthe dough onto a lightly floured surface and knead until smooth and elastic, about 8 minutes. Lightly oil a large bowl, place the dough in the bowl, turn to coat. Cover with a samp cloth and let rise in a warm place until doubled in volume, about 1 hour..
  6. Deflate the dough and turn it out onto a lightly floured surface. Roll out the dough to about 1/4 inch thick and spread the pesto mixture. Roll up the dough as tightly as possible and cut in half. You can place them crease side down in a prepared bread pan, or cut one ofthe logs up into spiral rolls. place them on a parchment sheet lined cookie sheet. Cover with a samp cloth and let rise until doubled in volume, about 40 minutes..
  7. Bake for 15-20 minutes in a preheated 200 degree oven, or until golden brown..
  8. Transfer fusiili pasta in a serving plate & sprinkle red chilli flakes all over. serve hot with pesto bread..

You can also make them for your brunch and weekend dinners where you can pair them with some Soup, Pizza, Crostini or Garlic Bread. Add pesto to cooked pasta; toss gently to coat. If necessary, toss in enough of the reserved cooking water to help coat the pasta evenly with pesto. Transfer pasta mixture to a serving bowl. You can make pesto pasta with any pasta your heart desires.

So that is going to wrap it up for this special food fusilli pasta in red sauce with herbed pesto bread recipe. Thank you very much for your time. I'm confident you can make this at home. There is gonna be interesting food in home recipes coming up. Remember to save this page in your browser, and share it to your loved ones, colleague and friends. Thanks again for reading. Go on get cooking!

How to Prepare Super Quick Homemade cheesed mash potatoes topped with
spring onions & chicken liver stew

How to Prepare Super Quick Homemade cheesed mash potatoes topped with spring onions & chicken liver stew

cheesed mash potatoes topped with spring onions & chicken liver stew. Sometimes I like basic Creamy Mashed Potatoes to accompany my dishes but this time I have added a few extra ingredients to give some kick to it. Untuk versi bahasa kunjungi Resep Mashed Potatoes Dengan Keju dan Daun Bawang. Sometimes I like basic Creamy Mashed Potatoes to accompany my.

cheesed mash potatoes topped with spring onions & chicken liver stew This Texas-inspired potato salad takes advantage of spring's sweet new potatoes and early onions. Mash them halfway so there are still some chunks--they shouldn't be totally smooth. Mashed potato puffs are flavored with onion powder, chives, and Cheddar cheese.

Hello everybody, hope you're having an incredible day today. Today, we're going to make a distinctive dish, cheesed mash potatoes topped with spring onions & chicken liver stew. It is one of my favorites. This time, I am going to make it a bit tasty. This will be really delicious.

Sometimes I like basic Creamy Mashed Potatoes to accompany my dishes but this time I have added a few extra ingredients to give some kick to it. Untuk versi bahasa kunjungi Resep Mashed Potatoes Dengan Keju dan Daun Bawang. Sometimes I like basic Creamy Mashed Potatoes to accompany my.

cheesed mash potatoes topped with spring onions & chicken liver stew is one of the most well liked of current trending meals on earth. It is enjoyed by millions every day. It's easy, it's quick, it tastes delicious. cheesed mash potatoes topped with spring onions & chicken liver stew is something that I have loved my entire life. They are nice and they look fantastic.

To begin with this particular recipe, we must prepare a few ingredients. You can cook cheesed mash potatoes topped with spring onions & chicken liver stew using 14 ingredients and 2 steps. Here is how you cook that.

The ingredients needed to make cheesed mash potatoes topped with spring onions & chicken liver stew:

  1. {Make ready 1/2 kg of Potatoes.
  2. {Take 250 grams of White goat cheese.
  3. {Prepare bunch of Spring onions.
  4. {Take 250 grams of Cottage cheese.
  5. {Take 400 grams of unsalted butter.
  6. {Make ready 1/2 kg of Fresh Chicken liver.
  7. {Take 2 1/4 of large onions.
  8. {Take 4 of Carrot.
  9. {Make ready 1/4 kg of Diced spring onions.
  10. {Take 1 cup of Milk.
  11. {Get of salt.
  12. {Get 2 clove of diced garlic.
  13. {Take 1/2 cup of vegetable stock.
  14. {Prepare 1 tsp of white pepper.

It's a nice change from the traditional potato side dish. Try these simple mashed potato puffs flavored with Cheddar cheese, chives, and Parmesan. They are quite easy to make and not as heavy as most potato sides. The spring onions add a really nice touch to the potatoes.

Instructions to make cheesed mash potatoes topped with spring onions & chicken liver stew:

  1. Fold butter, Spring onions, warm milk and the two cheeses with the mashed potatoes. Add salt to taste.
  2. Sautee onions and carrots garlic and add the chicken liver. Add vegetable stock and cook on medium heat for 7 minutes. Add white pepper. Salt to taste.

As you know, mashed potatoes can be served with so many proteins. The best type of potatoes to use are Red Rose, White Rose, or Yukon Gold as they are low in starch and high in moisture. These stand up well to the boil. Spring onions add an extra flavour to mash potato. The spring onions can be lightly cooked and mixed through the mash potato.

So that is going to wrap this up with this exceptional food cheesed mash potatoes topped with spring onions & chicken liver stew recipe. Thanks so much for your time. I'm sure you can make this at home. There's gonna be interesting food in home recipes coming up. Don't forget to save this page in your browser, and share it to your loved ones, colleague and friends. Thanks again for reading. Go on get cooking!

Recipe of Speedy Chicken Green Chili and Green Tomato

Recipe of Speedy Chicken Green Chili and Green Tomato

Chicken Green Chili and Green Tomato.

Chicken Green Chili and Green Tomato

Hey everyone, it's Louise, welcome to my recipe page. Today, I'm gonna show you how to make a special dish, chicken green chili and green tomato. One of my favorites. For mine, I'm gonna make it a little bit unique. This will be really delicious.

Chicken Green Chili and Green Tomato is one of the most well liked of recent trending foods in the world. It's enjoyed by millions daily. It is simple, it is fast, it tastes yummy. Chicken Green Chili and Green Tomato is something that I've loved my entire life. They're fine and they look fantastic.

To begin with this particular recipe, we have to first prepare a few ingredients. You can cook chicken green chili and green tomato using 15 ingredients and 5 steps. Here is how you cook that.

The ingredients needed to make Chicken Green Chili and Green Tomato:

  1. {Prepare 1 pcs of whole chicken (cut into 10).
  2. {Prepare 4 clove of garlic.
  3. {Prepare 6 pcs of shallot.
  4. {Prepare 7 pcs of green chili.
  5. {Make ready 3 pcs of big green chili.
  6. {Make ready 5 pcs of candlenut.
  7. {Prepare 5 cm of ginger.
  8. {Take 2 cm of turmeric.
  9. {Get 5 pcs of green tomato (cubed).
  10. {Prepare 10 cm of galangal (crushed).
  11. {Make ready 2 pcs of lemongrass (crushed).
  12. {Take 3 pcs of kaffir lime leaves (sliced).
  13. {Prepare 2 pcs of turmeric leaves (sliced).
  14. {Prepare 15 pcs of hot basil leaves.
  15. {Prepare of salt and pepper.

Steps to make Chicken Green Chili and Green Tomato:

  1. Blend roughly candlenut, ginger, turmeric, garlic, shallot, green chili, big green chili..
  2. Saute the blend with oil and add galangal, lemongrass, kaffir leaves, turmeric leaves and keep sauteing until cooked (raw bitter taste gone) and season with salt and pepper..
  3. Add chicken, mix it well and and cook for 15 minutes. Add water (half drowned) and green tomato. Mix it well..
  4. Cook again approximately 20 to 30 minutes until chicken is cooked. Make sure it is simmering until the liquid is reduct for 90%..
  5. Turn of the gas and add hot basil leaves, stir it slowly. Serve it with warm jasmine rice..

So that's going to wrap it up with this exceptional food chicken green chili and green tomato recipe. Thanks so much for reading. I'm confident you will make this at home. There is gonna be interesting food at home recipes coming up. Remember to save this page in your browser, and share it to your loved ones, friends and colleague. Thanks again for reading. Go on get cooking!

Step-by-Step Guide to Make Quick Peach Soft drink 🍑🍑

Step-by-Step Guide to Make Quick Peach Soft drink 🍑🍑

Peach Soft drink 🍑🍑.

Peach Soft drink 🍑🍑

Hey everyone, it's me again, Dan, welcome to my recipe page. Today, we're going to prepare a distinctive dish, peach soft drink 🍑🍑. It is one of my favorites. For mine, I am going to make it a little bit tasty. This will be really delicious.

Peach Soft drink 🍑🍑 is one of the most popular of current trending meals in the world. It's easy, it's quick, it tastes yummy. It's appreciated by millions every day. They are nice and they look wonderful. Peach Soft drink 🍑🍑 is something which I've loved my whole life.

To begin with this recipe, we must first prepare a few ingredients. You can have peach soft drink 🍑🍑 using 4 ingredients and 5 steps. Here is how you can achieve it.

The ingredients needed to make Peach Soft drink 🍑🍑:

  1. {Take 1 cup of peach.
  2. {Get Half of ltr sprite.
  3. {Take 2-3 tbs of sugar.
  4. {Get of Ice cubes as required.

Instructions to make Peach Soft drink 🍑🍑:

  1. Wash peach... peel off and cut into cubes....
  2. Now add peaches in blender....
  3. Add sugar and ice cubes and blend well....
  4. Now add sprite and blend again for few seconds....
  5. Peach soft drink is ready....serve chill....

So that is going to wrap it up with this exceptional food peach soft drink 🍑🍑 recipe. Thank you very much for your time. I am confident that you will make this at home. There's gonna be interesting food in home recipes coming up. Remember to bookmark this page on your browser, and share it to your family, colleague and friends. Thanks again for reading. Go on get cooking!

Step-by-Step Guide to Prepare Any-night-of-the-week Sambal Eggplant and
bitter bean

Step-by-Step Guide to Prepare Any-night-of-the-week Sambal Eggplant and bitter bean

Sambal Eggplant and bitter bean.

Sambal Eggplant and bitter bean

Hey everyone, I hope you're having an incredible day today. Today, I'm gonna show you how to prepare a distinctive dish, sambal eggplant and bitter bean. One of my favorites food recipes. This time, I am going to make it a little bit tasty. This will be really delicious.

Sambal Eggplant and bitter bean is one of the most well liked of current trending foods on earth. It's appreciated by millions daily. It's easy, it's fast, it tastes yummy. Sambal Eggplant and bitter bean is something which I've loved my whole life. They're nice and they look wonderful.

To begin with this particular recipe, we must first prepare a few components. You can cook sambal eggplant and bitter bean using 10 ingredients and 3 steps. Here is how you cook that.

The ingredients needed to make Sambal Eggplant and bitter bean:

  1. {Get 100 g of bitter/stinky bean (halve).
  2. {Get 3-4 of medium size eggplant cut and halve.
  3. {Prepare 200 g of dried shrimp.
  4. {Take 1 bunch of dried chilli (depends on you hot,mild or just right).
  5. {Get 1 of fresh chilli seeded.
  6. {Take 3 cloves of Garlic.
  7. {Make ready 6 cloves of shallot.
  8. {Get to taste of Salt and pepper enough.
  9. {Take 2 teaspoon of Sugar.
  10. {Make ready of Oil for cooking.

Instructions to make Sambal Eggplant and bitter bean:

  1. You need a mortar or food processor Prep dried shrimp,dried chilli,garlic,shallot bruise,smash in a mortar or process until coarse paste..
  2. In a hot wok put oil and fry the paste until fragrant then add bitter bean,keep stirring then add eggplant cook a little bit,add salt,pepper and sugar. Taste it. Get the flavor right. And you are done..
  3. Tips if you dont like your eggplant to be mushy or over cooked you can toss them in cornstarch and fry them a little bit then put it in the last cooking process..

So that's going to wrap this up with this exceptional food sambal eggplant and bitter bean recipe. Thank you very much for your time. I'm confident you can make this at home. There's gonna be more interesting food at home recipes coming up. Don't forget to save this page on your browser, and share it to your family, friends and colleague. Thank you for reading. Go on get cooking!