Recipe of Quick Ginger ale Sausage and Rice

Recipe of Quick Ginger ale Sausage and Rice

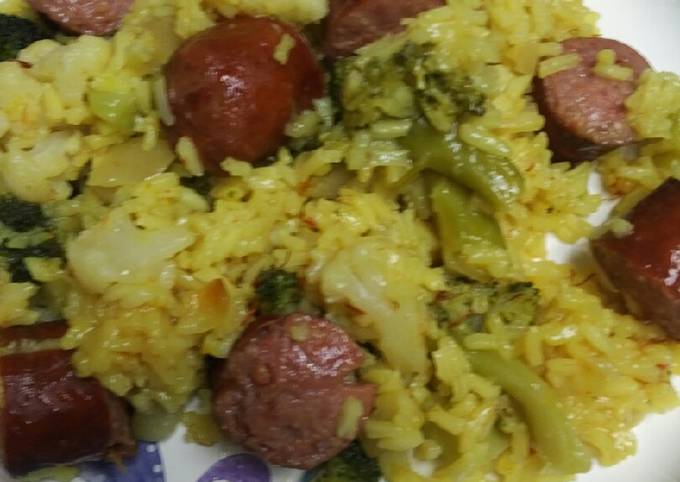
Ginger ale Sausage and Rice. Here's a delicious stew that'll warm your soul! This recipe is totally vegan and could easily be made gluten free! See recipes for Chicken and Chinese Sausage Rice (Rice Cooker) too. ginger ale, I used Vernor's•kielbasa smoked beef sausage•rice•vegetable oil•diced onions•salt•saffron flowers•steamed broccoli and cauliflower mix.

Ginger ale Sausage and Rice There are two main types of ginger ale. The golden style is credited to the Irish doctor Thomas Joseph Cantrell. Authentic Japanese ginger rice recipe, fragrant Japanese rice cooked with ginger, fried tofu skin, and flavorful soy sauce base seasonings.

Hey everyone, it's me again, Dan, welcome to our recipe page. Today, I'm gonna show you how to prepare a special dish, ginger ale sausage and rice. It is one of my favorites food recipes. For mine, I am going to make it a little bit unique. This is gonna smell and look delicious.

Ginger ale Sausage and Rice is one of the most popular of recent trending meals on earth. It's appreciated by millions daily. It is simple, it's quick, it tastes yummy. Ginger ale Sausage and Rice is something that I've loved my whole life. They are fine and they look fantastic.

Here's a delicious stew that'll warm your soul! This recipe is totally vegan and could easily be made gluten free! See recipes for Chicken and Chinese Sausage Rice (Rice Cooker) too. ginger ale, I used Vernor's•kielbasa smoked beef sausage•rice•vegetable oil•diced onions•salt•saffron flowers•steamed broccoli and cauliflower mix.

To begin with this particular recipe, we have to first prepare a few components. You can have ginger ale sausage and rice using 9 ingredients and 11 steps. Here is how you can achieve that.

The ingredients needed to make Ginger ale Sausage and Rice:

  1. {Take 12 ounces of ginger ale, I used Vernor's.
  2. {Get 1 pound of kielbasa smoked beef sausage.
  3. {Take 1 cup of rice.
  4. {Make ready 1/4 cup of vegetable oil.
  5. {Make ready 1/2 cup of diced onions.
  6. {Take 1 teaspoon of salt.
  7. {Get 1 tablespoon of saffron flowers.
  8. {Take 12 ounces of steamed broccoli and cauliflower mix.
  9. {Prepare 2 cup of water.

What dish to go with Ginger Rice. We recently ate Ginger Rice and Miso Salmon together and it was fantastic. Japanese Ingredient Substitution: If you want to look. Put the ginger and lemon rinds in a small bowl with the honey.

Instructions to make Ginger ale Sausage and Rice:

  1. Heat the oil and fry the rice.
  2. When the rice starts to turn white add the ginger ale and 1 cup water. Bring to a simmer..
  3. Add the salt and saffron flowers. Note saffron flowers is different than the spice saffron. It's cheaper and not as flavorable as actual saffron..
  4. Stir well. Let boil for 10 minutes.
  5. By now the rice should be low on liquids. Slice the sausage into 1 inch size. Add into the rice..
  6. Let it simmer stirring occasionally for 3-5 minutes..
  7. Add the second cup of water. Steam the broccoli and cauliflower..
  8. Add the broccoli and cauliflower after you steam 5 minutes..
  9. Stir in taste and adjust salt if need be..
  10. Cover and remove from heat. Let rest 15 minutes..
  11. Serve I hope you enjoy!!!.

Ginger beer is used in plenty of drinks, but ginger ale makes a great mixer as well. Learn to use ginger ale in cocktails with these five drinks. Ginger beer this, ginger beer that—we've had it. This is our "Marcia Marcia Marcia" moment. It's time to give some love to that other ginger soda, ginger ale, the.

So that's going to wrap it up for this special food ginger ale sausage and rice recipe. Thank you very much for reading. I am confident that you will make this at home. There's gonna be more interesting food at home recipes coming up. Don't forget to save this page in your browser, and share it to your family, colleague and friends. Thanks again for reading. Go on get cooking!

Recipe of Favorite Slow Cooker Red Beans

Recipe of Favorite Slow Cooker Red Beans

Slow Cooker Red Beans.

Slow Cooker Red Beans

Hello everybody, hope you're having an incredible day today. Today, we're going to prepare a special dish, slow cooker red beans. One of my favorites. For mine, I am going to make it a little bit tasty. This will be really delicious.

Slow Cooker Red Beans is one of the most well liked of current trending meals in the world. It's enjoyed by millions every day. It's simple, it's fast, it tastes yummy. They're nice and they look fantastic. Slow Cooker Red Beans is something that I've loved my entire life.

To get started with this recipe, we must first prepare a few ingredients. You can cook slow cooker red beans using 7 ingredients and 7 steps. Here is how you cook it.

The ingredients needed to make Slow Cooker Red Beans:

  1. {Make ready 2 bags (16 oz) of each) red beans.
  2. {Make ready 1/4 cup of Worcestershire sauce.
  3. {Make ready 3 tbsp of garlic salt.
  4. {Prepare to taste of Cajun seasoning.
  5. {Take 1 of onion.
  6. {Get 1 pkg of smoked sausage.
  7. {Make ready 16 oz of Salt pork (or hamhocks & or pig tails) for seasoning - approx.

Instructions to make Slow Cooker Red Beans:

  1. You really need to soak your beans overnight. I've always been skeptical of this practice; but my mom says it keeps everyone from getting the farts. If I'm making beans on Sunday, I'll soak them in the crock pot with the Worcestershire sauce on Saturday night. 2 packages of beans usually equals a crock pot half full of water..
  2. On the next day, add your garlic and Cajun seasoning before turning on your slow cooker. If I'm making supper for 6:30pm, the beans need to start cooking no later than 10 am. Put your slow cooker on the high setting..
  3. 3 hours into cooking, add your seasoning meats. If you're using hamhocks and/or pig tails, you can add them directly. If you are using salt pork, slice into strips and cook until brown before adding. If you are using salt pork, be sure to add the grease along with the meat!.
  4. After an additional 2 hours, finely chop your onion and add to the beans. Be sure to stir gently to mix them in well..
  5. Slow cooking your beans will take approximately 8 hours to complete from start to finish once they're cooking. When you have 1.5 hours to go, cut your smoked sausage into medallions and then cut the medallions in half. Fry briefly in an iron skillet until slightly cooked and then add immediately to beans. Stir gently to mix well..
  6. During the last hour of cooking, add additional garlic salt &/or Cajun seasoning to taste. The beans should have a creamy consistency at this point..
  7. Serve over rice in bowls with bread of choice or cornbread..

So that is going to wrap this up for this special food slow cooker red beans recipe. Thanks so much for your time. I'm sure you can make this at home. There's gonna be interesting food at home recipes coming up. Remember to save this page on your browser, and share it to your family, friends and colleague. Thanks again for reading. Go on get cooking!

Easiest Way to Make Super Quick Homemade Simple Beef Stew

Easiest Way to Make Super Quick Homemade Simple Beef Stew

Simple Beef Stew.

Simple Beef Stew

Hello everybody, it is John, welcome to my recipe site. Today, I will show you a way to make a special dish, simple beef stew. It is one of my favorites. This time, I will make it a bit tasty. This will be really delicious.

Simple Beef Stew is one of the most favored of current trending meals in the world. It's enjoyed by millions every day. It's simple, it is fast, it tastes delicious. They are nice and they look wonderful. Simple Beef Stew is something which I've loved my whole life.

To begin with this particular recipe, we have to prepare a few ingredients. You can cook simple beef stew using 10 ingredients and 6 steps. Here is how you cook that.

The ingredients needed to make Simple Beef Stew:

  1. {Take 500 g of stew beef (cubed).
  2. {Get 250 g of soup beef.
  3. {Prepare 1 handful of baby carrots (cut).
  4. {Make ready 1 tbs of butter.
  5. {Get 1 of yellow onion (minced).
  6. {Prepare 1 tbs of Cornflour (mix with 2 tbs water).
  7. {Prepare 3 tbs of blackpepper corn (crushed).
  8. {Get Splash of Worcestershire sauce.
  9. {Take 1 tsp of dried parsley.
  10. {Make ready 1 of potato (cubed).

Steps to make Simple Beef Stew:

  1. Boil soup beef to make broth. Take out the beef and keep the beef stock..
  2. Add butter and olive oil into another pot and caramelize the stew beef, discard and then caramelize the onion in the same pot. Add in garlic..
  3. Add potatoes, carrots and the cooked stew beef. Salt and pepper it. Use both black and white pepper..
  4. Add in the beef stock, add Worcestershire sauce, parsley, salt and pepper as needed..
  5. Thickens the stew with cornstarch..
  6. Remove stew from pot and keep in a slow cooker so that you can enjoy it warm anytime..

So that's going to wrap it up for this exceptional food simple beef stew recipe. Thanks so much for your time. I am confident that you will make this at home. There's gonna be interesting food at home recipes coming up. Remember to save this page in your browser, and share it to your family, colleague and friends. Thank you for reading. Go on get cooking!

Step-by-Step Guide to Prepare Award-winning Bacon jalapono cheese dip

Step-by-Step Guide to Prepare Award-winning Bacon jalapono cheese dip

Bacon jalapono cheese dip.

Bacon jalapono cheese dip

Hello everybody, I hope you're having an amazing day today. Today, I'm gonna show you how to prepare a special dish, bacon jalapono cheese dip. It is one of my favorites food recipes. For mine, I am going to make it a bit tasty. This will be really delicious.

Bacon jalapono cheese dip is one of the most well liked of recent trending meals on earth. It's easy, it's fast, it tastes yummy. It is appreciated by millions every day. Bacon jalapono cheese dip is something that I've loved my entire life. They're nice and they look wonderful.

To begin with this recipe, we must prepare a few components. You can cook bacon jalapono cheese dip using 7 ingredients and 5 steps. Here is how you can achieve that.

The ingredients needed to make Bacon jalapono cheese dip:

  1. {Get 6 of chopped slices of bacon.
  2. {Take 8 oz of cream cheese (cut into cubes).
  3. {Get 1 can of Green chillies.
  4. {Get 2 cup of sharp cheese.
  5. {Take 2 of jalapeños sliced and chopped fine.
  6. {Get 1 bottle of Corona.
  7. {Get 1 tbsp of flour.

Instructions to make Bacon jalapono cheese dip:

  1. Chop bacon, place in pan (medium heat) cook slightly until it starts to crisp. (Don't drain fat).
  2. Chop the jalapenos seedless, cook with the bacon until the jalapenos start to soften and bacon is crispy..
  3. Add the flour and whisk, slowly add beer, continue to whisk until it reduces half way.
  4. Add cream cheese and cheese, blend all together.
  5. Finally add the green chillies, turn to low heat or transfer into a crock pot. Ready to serve.

So that's going to wrap this up for this exceptional food bacon jalapono cheese dip recipe. Thank you very much for reading. I am confident you will make this at home. There is gonna be interesting food in home recipes coming up. Remember to save this page on your browser, and share it to your loved ones, friends and colleague. Thanks again for reading. Go on get cooking!

Step-by-Step Guide to Prepare Any-night-of-the-week Wakame Rice

Step-by-Step Guide to Prepare Any-night-of-the-week Wakame Rice

Wakame Rice.

Wakame Rice

Hello everybody, it's Louise, welcome to our recipe site. Today, I'm gonna show you how to prepare a distinctive dish, wakame rice. It is one of my favorites. This time, I am going to make it a little bit unique. This is gonna smell and look delicious.

Wakame Rice is one of the most well liked of recent trending meals in the world. It's easy, it is quick, it tastes yummy. It's enjoyed by millions every day. They are nice and they look wonderful. Wakame Rice is something that I have loved my entire life.

To get started with this particular recipe, we must prepare a few ingredients. You can have wakame rice using 6 ingredients and 4 steps. Here is how you can achieve that.

The ingredients needed to make Wakame Rice:

  1. {Prepare 2 cups of (*180ml cup) Japanese Short Grain Rice.
  2. {Get 400 ml of Dashi Stock *OR Water and 1/2 to 1 teaspoon Dashi Powder.
  3. {Make ready 1 tablespoon of Mirin.
  4. {Make ready 1 teaspoon of Salt.
  5. {Prepare 2 tablespoons of Dry Cut Wakame.
  6. {Get 1 tablespoon of Toasted Sesame Seeds.

Steps to make Wakame Rice:

  1. Wash Rice by stirring it thoroughly in water with your hand and drain the water. Repeat this a few more times until water flows through clear..
  2. Drain the rice and place it into the rice cooker’s inner pot. Add the Dashi Stock (OR Water and Dashi Powder), Mirin and Salt. Add more Water if needed to make the liquid up to the 2-cups-marking. Press ‘COOK’ button to start cooking..
  3. Soak Dried Cut Wakame in cold water until soft, drain well. *Note: If Wakame pieces are large, break (or cut) into smaller pieces before soak..
  4. When the rice is cooked, let it steamed for 10 minutes. Then loosen, add well-drained Wakame and Toasted Sesame Seeds, and mix gently..

So that's going to wrap it up with this special food wakame rice recipe. Thanks so much for your time. I am confident that you will make this at home. There is gonna be more interesting food at home recipes coming up. Remember to save this page in your browser, and share it to your family, colleague and friends. Thank you for reading. Go on get cooking!

Recipe of Speedy Bafvada

Recipe of Speedy Bafvada

Bafvada.

Bafvada

Hello everybody, it's me again, Dan, welcome to our recipe site. Today, I'm gonna show you how to make a special dish, bafvada. It is one of my favorites food recipes. For mine, I will make it a bit unique. This will be really delicious.

Bafvada is one of the most favored of current trending meals in the world. It is simple, it's quick, it tastes delicious. It's enjoyed by millions daily. They are nice and they look wonderful. Bafvada is something that I've loved my whole life.

To begin with this recipe, we must first prepare a few ingredients. You can have bafvada using 10 ingredients and 7 steps. Here is how you cook it.

The ingredients needed to make Bafvada:

  1. {Get 1 of potato boiled.
  2. {Take 2 tbsp of water chestnuts flour or arrowroot flour.
  3. {Make ready 2 tbsp of peanuts and sesame seeds roasted coarse powder.
  4. {Get 1 tbsp of grated coconut.
  5. {Prepare 1 of finely chopped chilli.
  6. {Make ready 1 tbsp of chopped coriander.
  7. {Take 1 tbsp of sugar.
  8. {Make ready 1/2 of lemon juice.
  9. {Prepare To taste of Salt.
  10. {Get As needed of Oil for frying.

Steps to make Bafvada:

  1. Grate boiled potato..
  2. Add chestnut flour and salt..
  3. Take peanut coarse powder and add sugar, Salt, chopped chilli and coriander, grated coconut and lemon to it. Mix the filling well with hands..
  4. Take potato dough and stuff it with the peanut filling..
  5. Roll it in chestnut flour if required..
  6. Fry on medium flame in hot oil..
  7. Serve with green or red chutney..

So that's going to wrap this up for this special food bafvada recipe. Thank you very much for your time. I am confident that you will make this at home. There is gonna be interesting food at home recipes coming up. Remember to bookmark this page in your browser, and share it to your loved ones, friends and colleague. Thanks again for reading. Go on get cooking!

Easiest Way to Prepare Award-winning Boiled chicken and chicken rice

Easiest Way to Prepare Award-winning Boiled chicken and chicken rice

Boiled chicken and chicken rice. Chicken rice is one of the national dishes of Singapore. After Hup Hong we took a drive across Singapore to a legendary boiled chicken rice restaurant, and a place that serves an original pretty old fashioned Hainanese boiled chicken style. Boiled chicken and rice—although it may not sound very exciting—is the dog equivalent to the age-old, human remedy of chicken soup.

Boiled chicken and chicken rice A Traditional South Carolina DishSouthern Food Junkie. rice, oil, medium onion, pepper, chicken, salt, butter. Chicken and rice are without a doubt two of the most popular foods among fitness folk. Chicken Rice is boiled chicken over rice served with a few condiments.

Hello everybody, I hope you're having an amazing day today. Today, we're going to prepare a distinctive dish, boiled chicken and chicken rice. It is one of my favorites food recipes. For mine, I am going to make it a little bit tasty. This will be really delicious.

Boiled chicken and chicken rice is one of the most popular of current trending foods on earth. It's easy, it's quick, it tastes yummy. It is enjoyed by millions every day. They're fine and they look wonderful. Boiled chicken and chicken rice is something that I have loved my whole life.

Chicken rice is one of the national dishes of Singapore. After Hup Hong we took a drive across Singapore to a legendary boiled chicken rice restaurant, and a place that serves an original pretty old fashioned Hainanese boiled chicken style. Boiled chicken and rice—although it may not sound very exciting—is the dog equivalent to the age-old, human remedy of chicken soup.

To get started with this particular recipe, we have to first prepare a few ingredients. You can cook boiled chicken and chicken rice using 12 ingredients and 11 steps. Here is how you cook it.

The ingredients needed to make Boiled chicken and chicken rice:

  1. {Make ready 1.3 kg of Chicken.
  2. {Prepare 4 ltr of Water.
  3. {Take 15 gr of coriander.
  4. {Get 2 cups of rice (jasmine).
  5. {Prepare 2-3 cups of chicken stock.
  6. {Make ready 100 gr of ginger.
  7. {Take 1/4 of Onion.
  8. {Make ready 10-15 pcs of chili.
  9. {Take 2-3 tbsp of Sesame oil.
  10. {Get 4 tbsp of Vegetable oil.
  11. {Prepare of Salt.
  12. {Prepare of Maggi/knorr seasonings.

It couldn't be simpler, or more confounding, because of its utter purity. This preparation seems so refreshing in our culture of grilled chicken breasts and supermarket rotisserie chicken. Recipe with step by step photos for Hainanese Chicken Rice and soup. This will make them cool enough to shred and help keep some of the moisture in so.

Instructions to make Boiled chicken and chicken rice:

  1. The night before you may brine the chicken. In a bowl, add enough water until the chicken is covered/submerged by water. Add 1 tbsp salt and mix it well. Cover it and place it in the fridge overnight. (Optional: it gives better taste to the chicken without over seasonings the broth).
  2. Remove the excess fat from the chicken (used to stir fry the rice).
  3. In a pot, bring 4ltr waters to boil. Add the chicken into it. With medium heat, slowly bring the water to boil again. Reduce the heat to low, let it simmer the chicken for 1-1.5 hours depend on the chicken size..
  4. Prepare the condiments. Peel, grate or chop the ginger. Keep one tablespoon aside for the rice..
  5. Remove the seeds of chili-using handgloves (optional: to reduce the spiciness). Chopped/sliced the chili.
  6. Mix the grated ginger and chopped chili in a bowl. Add vegetable oil, sesame oil, salt and little maggi seasonings. Adjust the taste. Keep it aside..
  7. Wash the rice to remove the starch). Soak the rice for 15 minutes and drain it before cooking (optional).
  8. In a pot, add 1 tbsp oil. Add the excess fat of chicken, stir it for a minute. Add the chopped onion and ginger into the pot. Stir fry for a minute, add the rice into it. Mix it well. Add two cups of chicken stock (from the boiled chicken). Bring it to boil, reduce the heat into low..
  9. Stir the rice during the cooking time to prevent it stick on the bottom of the pot. When the water is absorbed by the rice (10 mins since it is boiled), switch off the heat. Stir the rice once and cover the pot for another 5 minutes. Open it up and stir it again. It is fluffy and ready..
  10. Dip the coriander into water to refresh it. Drain and dry it before served..
  11. After 1-1.5 hrs, Remove the chicken from the pot. Slice as your wish. Meal is ready to serve..

Nadiya's easy chicken and rice recipe lets the oven do all the work. No nutrition or calorie comments found. Want to try some chicken and rice recipes? If you want a complete meal for lunch or dinner, this is a list you should check out. With all the chicken recipes I've tried this month, I thought, "Why not throw in some rice in the mix?".

So that's going to wrap it up for this exceptional food boiled chicken and chicken rice recipe. Thank you very much for your time. I'm sure you can make this at home. There is gonna be more interesting food in home recipes coming up. Don't forget to bookmark this page in your browser, and share it to your family, friends and colleague. Thank you for reading. Go on get cooking!

Easiest Way to Make Homemade Greek Pasta with Shrimp

Easiest Way to Make Homemade Greek Pasta with Shrimp

Greek Pasta with Shrimp.

Greek Pasta with Shrimp

Hello everybody, hope you are having an incredible day today. Today, we're going to make a special dish, greek pasta with shrimp. One of my favorites food recipes. For mine, I will make it a little bit unique. This is gonna smell and look delicious.

Greek Pasta with Shrimp is one of the most well liked of current trending foods on earth. It's simple, it's quick, it tastes yummy. It is enjoyed by millions daily. They're fine and they look wonderful. Greek Pasta with Shrimp is something which I have loved my whole life.

To get started with this recipe, we must prepare a few ingredients. You can cook greek pasta with shrimp using 16 ingredients and 3 steps. Here is how you cook it.

The ingredients needed to make Greek Pasta with Shrimp:

  1. {Get of About 20 small shrimp, peeled and deveined.
  2. {Prepare 8 oz of egg noodles, cooked al dente.
  3. {Make ready 1/2 of an onion, chopped.
  4. {Make ready 4 of garlic cloves, minced.
  5. {Prepare 1/4 cup of cilantro, lightly packed.
  6. {Prepare of About 10 cherry tomatoes, I cut mine in half.
  7. {Prepare of About 15 kalamata olives, pitted.
  8. {Make ready of Juice from 1 lemon.
  9. {Get of Zest from 1 lemon.
  10. {Prepare 1 tbsp of olive oil.
  11. {Make ready 2 tbsp of butter.
  12. {Take 1 tsp of cayenne.
  13. {Prepare 1 tsp of salt.
  14. {Get 2 tsp of pepper.
  15. {Take 1 tsp of dried oregano.
  16. {Get of Feta cheese for topping.

Steps to make Greek Pasta with Shrimp:

  1. In a skillet on medium heat add olive oil, onion and shrimp. Cook about 5 min then add garlic, cilantro and seasonings. Stir..
  2. Once shrimp are nearly cooked (about 5 more min) add butter, tomatoes, olives, cooked pasta, lemon juice and zest. Give it a good toss..
  3. Stirring every min or 2, cook for about 5 min more so pasta can soak up all that yumminess! Top with plenty of feta cheese! Boom. That’s it. Crazy easy. Crazy good..

So that is going to wrap it up with this exceptional food greek pasta with shrimp recipe. Thank you very much for reading. I'm sure you will make this at home. There is gonna be interesting food in home recipes coming up. Remember to bookmark this page on your browser, and share it to your family, colleague and friends. Thank you for reading. Go on get cooking!

Recipe of Quick Dr Pepper Slow Cooker Ribs

Recipe of Quick Dr Pepper Slow Cooker Ribs

Dr Pepper Slow Cooker Ribs.

Dr Pepper Slow Cooker Ribs

Hello everybody, it's Louise, welcome to my recipe site. Today, I'm gonna show you how to make a special dish, dr pepper slow cooker ribs. It is one of my favorites food recipes. This time, I'm gonna make it a bit tasty. This is gonna smell and look delicious.

Dr Pepper Slow Cooker Ribs is one of the most popular of current trending foods in the world. It's easy, it's quick, it tastes yummy. It's enjoyed by millions daily. They're nice and they look fantastic. Dr Pepper Slow Cooker Ribs is something that I've loved my whole life.

To get started with this particular recipe, we must first prepare a few ingredients. You can have dr pepper slow cooker ribs using 5 ingredients and 5 steps. Here is how you can achieve that.

The ingredients needed to make Dr Pepper Slow Cooker Ribs:

  1. {Prepare 1 pack of pork or beef ribs.
  2. {Make ready 2 of sixteen oz bottles of Dr Pepper.
  3. {Prepare to taste of seasoned salt.
  4. {Take to taste of garlic powder.
  5. {Make ready 1 bottle of barbecue sauce.

Instructions to make Dr Pepper Slow Cooker Ribs:

  1. Place ribs in slow cooker. Turn setting to high. 5 hrs for pork ribs. 6 hrs for beef..
  2. Add both bottles of Dr Pepper, seasoned salt and garlic pepper..
  3. Once ribs are TENDER, remove from pot and place in sauce pan. Cover. Pre-heat oven to 400 degrees..
  4. Once oven has reached desired temp, drizzle barbecue sauce over ribs. Place in oven for 15-20 min..
  5. Remove ribs from oven. Prepare to forget about your grill....

So that's going to wrap this up with this exceptional food dr pepper slow cooker ribs recipe. Thank you very much for your time. I am confident you will make this at home. There is gonna be interesting food in home recipes coming up. Remember to bookmark this page on your browser, and share it to your family, friends and colleague. Thanks again for reading. Go on get cooking!

How to Prepare Super Quick Homemade Shrimp stuffed bacon wrapped chicken

How to Prepare Super Quick Homemade Shrimp stuffed bacon wrapped chicken

Shrimp stuffed bacon wrapped chicken.

Shrimp stuffed bacon wrapped chicken

Hello everybody, it's me, Dave, welcome to our recipe site. Today, I'm gonna show you how to make a distinctive dish, shrimp stuffed bacon wrapped chicken. It is one of my favorites. For mine, I will make it a little bit unique. This will be really delicious.

Shrimp stuffed bacon wrapped chicken is one of the most favored of current trending foods on earth. It is appreciated by millions every day. It is simple, it's quick, it tastes delicious. Shrimp stuffed bacon wrapped chicken is something which I have loved my whole life. They're nice and they look wonderful.

To begin with this particular recipe, we must prepare a few components. You can cook shrimp stuffed bacon wrapped chicken using 6 ingredients and 8 steps. Here is how you cook that.

The ingredients needed to make Shrimp stuffed bacon wrapped chicken:

  1. {Prepare 6 of chicken breast.
  2. {Get 1 of package deveined detailed shrimp.
  3. {Take 12 of strips meaty nacon.
  4. {Get 1 of package shredded cheese of choice.
  5. {Prepare 1 of choppef onion.
  6. {Make ready 1 of chopped banana or jelpeno peppers.

Instructions to make Shrimp stuffed bacon wrapped chicken:

  1. Butterfly chicken by cutting horizontally down the chicken.do not cut completely in half..
  2. .
  3. .
  4. Season chicken to liking and place desired toppings on chicken.
  5. Fold over like a sandwich.
  6. Wrap with 2 slices of bacon each..
  7. Bake on over at 400 until meat is co.pletely cooked..
  8. Enjoy.

So that is going to wrap it up with this exceptional food shrimp stuffed bacon wrapped chicken recipe. Thank you very much for reading. I am confident you can make this at home. There is gonna be more interesting food at home recipes coming up. Remember to save this page on your browser, and share it to your loved ones, friends and colleague. Thanks again for reading. Go on get cooking!

Recipe of Quick Electric lemonade

Recipe of Quick Electric lemonade

Electric lemonade.

Electric lemonade

Hey everyone, hope you're having an incredible day today. Today, I will show you a way to prepare a special dish, electric lemonade. It is one of my favorites. For mine, I am going to make it a bit tasty. This will be really delicious.

Electric lemonade is one of the most well liked of recent trending foods on earth. It's simple, it's fast, it tastes delicious. It's appreciated by millions every day. Electric lemonade is something which I've loved my entire life. They're nice and they look wonderful.

To begin with this recipe, we must first prepare a few ingredients. You can have electric lemonade using 5 ingredients and 2 steps. Here is how you cook it.

The ingredients needed to make Electric lemonade:

  1. {Get 1/2 cup of simple sugar syrup.
  2. {Make ready 1 cup of ice cubes.
  3. {Make ready 1/4 cup of lime juice.
  4. {Prepare of Any soda drink (I used Sprite.
  5. {Get of Colour of ur choice (I used blue).

Steps to make Electric lemonade:

  1. Zaki samu cup dinki ki Fara saka sugar syrup kamar 2 tablespoon Sai lime juice 1 tablespoon spoon.
  2. Saiki zuba kankara kisa soda drink den ur colour Zaki zuba Dan drop of colour nee saikisa straw kijuya kadan saikibarshi haka ba all ake juyawaba kadan then serve😋.

So that's going to wrap this up with this exceptional food electric lemonade recipe. Thank you very much for your time. I'm sure that you can make this at home. There's gonna be more interesting food at home recipes coming up. Don't forget to bookmark this page on your browser, and share it to your family, colleague and friends. Thanks again for reading. Go on get cooking!

How to Make Award-winning Black Bean & Okara Cake (Matcha & Kuromitsu
Flavour)

How to Make Award-winning Black Bean & Okara Cake (Matcha & Kuromitsu Flavour)

Black Bean & Okara Cake (Matcha & Kuromitsu Flavour).

Black Bean & Okara Cake (Matcha & Kuromitsu Flavour)

Hello everybody, I hope you are having an incredible day today. Today, I will show you a way to prepare a distinctive dish, black bean & okara cake (matcha & kuromitsu flavour). It is one of my favorites. For mine, I'm gonna make it a bit tasty. This is gonna smell and look delicious.

Black Bean & Okara Cake (Matcha & Kuromitsu Flavour) is one of the most well liked of recent trending foods on earth. It is enjoyed by millions every day. It's simple, it is quick, it tastes yummy. They're nice and they look wonderful. Black Bean & Okara Cake (Matcha & Kuromitsu Flavour) is something that I have loved my whole life.

To get started with this recipe, we must prepare a few components. You can cook black bean & okara cake (matcha & kuromitsu flavour) using 11 ingredients and 10 steps. Here is how you can achieve that.

The ingredients needed to make Black Bean & Okara Cake (Matcha & Kuromitsu Flavour):

  1. {Prepare 300 grams of Fresh okara.
  2. {Prepare 2 medium of Egg.
  3. {Prepare 100 ml of Soy milk.
  4. {Prepare 70 grams of Boiled kuromame.
  5. {Take 2 stick of Matcha (I used store-bought matcha latte mix).
  6. {Get 1 tbsp of Kuromitsu.
  7. {Get of Brown sugar walnuts & koshi-an version.
  8. {Take 100 grams of Koshi-an (store-bought).
  9. {Make ready 3 of Brown sugar coated walnuts (store-bought).
  10. {Make ready 1 tbsp of Condensed milk.
  11. {Make ready 1 of Used tea leaves (optional).

Instructions to make Black Bean & Okara Cake (Matcha & Kuromitsu Flavour):

  1. Prepare the kuromame by soaking for 4-6 hours and boiling them..
  2. Make the cake batter by mixing the fresh okara with the matcha until it's evenly distributed..
  3. Separate the egg whites and yolks. Mix the egg yolks with 1/2 of the kuromitsu and soy milk. Whip the egg whites until soft peaks form, then add the rest of the sugar and continue to whip until stiff peaks form..
  4. Mix the egg yolk mixture into the okara mixture in 2 batches, add the black soy beans and stir in until evenly distributed..
  5. Add the whipped egg whites to the okara mixture in 2 batches, folding gently after each addition. Pour the mixture into the rice cooker pot and drop the pot from a height onto a surface to eliminate excess air bubbles..
  6. Cook in the rice cooker. Do this by first leaving the cake to cook on the normal rice cooking mode until it's half-baked. Then set it to cook again on quick cooking mode..
  7. To cool the cake, switch off the warming function, then open the lid and allow it to cool inside the rice cooker..
  8. Let the cake thoroughly cool until you can easily remove it from the rice cooker pot, then it's ready to eat..
  9. Here is another variation to this recipe: Mix used green tea leaves into the batter in place of the black soy beans, then sandwich some koshi-an and brown sugar walnuts for an authentic Japanese confectionary..
  10. For this version, the egg yolk should be mixed with 1 tablespoon of kuromitsu and the egg white should be mixed with 1 tablespoon of condensed milk. The cake should contain 100 g of koshi-an and 3 brown sugar walnuts. One cake is 145 kcal..

So that's going to wrap this up for this special food black bean & okara cake (matcha & kuromitsu flavour) recipe. Thanks so much for your time. I am confident that you will make this at home. There is gonna be more interesting food in home recipes coming up. Remember to save this page on your browser, and share it to your family, colleague and friends. Thanks again for reading. Go on get cooking!

Simple Way to Make Speedy Paneer-Sprouts Tikkis

Simple Way to Make Speedy Paneer-Sprouts Tikkis

Paneer-Sprouts Tikkis.

Paneer-Sprouts Tikkis

Hello everybody, hope you are having an amazing day today. Today, I'm gonna show you how to make a special dish, paneer-sprouts tikkis. It is one of my favorites food recipes. For mine, I'm gonna make it a bit tasty. This is gonna smell and look delicious.

Paneer-Sprouts Tikkis is one of the most favored of recent trending meals on earth. It's easy, it's quick, it tastes yummy. It's appreciated by millions daily. Paneer-Sprouts Tikkis is something that I have loved my whole life. They're fine and they look wonderful.

To get started with this particular recipe, we have to prepare a few ingredients. You can have paneer-sprouts tikkis using 14 ingredients and 6 steps. Here is how you can achieve that.

The ingredients needed to make Paneer-Sprouts Tikkis:

  1. {Make ready 1 cup of homemade paneer.
  2. {Get 1/2 cup of moong sprouts.
  3. {Make ready 1 of small carrot grated.
  4. {Get 3-4 of green chillies.
  5. {Take 1 of " ginger piece.
  6. {Make ready 1/4 cup of finely chopped fresh coriander leaves.
  7. {Take 1/2 cup of bread crumbs.
  8. {Prepare 1/2 tsp of garam masala.
  9. {Prepare 1 tbsp of lemon juice.
  10. {Make ready to taste of Salt.
  11. {Prepare of To make slurry:.
  12. {Prepare 1 tbsp of corn flour/ arrowroot powder dissolved in 2-3 tbsp water.
  13. {Make ready of Bread crumbs for coating as required.
  14. {Take of Oil for roasting.

Steps to make Paneer-Sprouts Tikkis:

  1. In mixer jar add green moong sprouts, chillies ginger pieces. Grind to smooth paste..
  2. Transfer in mixing bowl,add all other mentioned ingredients in it. Mix well..
  3. Divide into 6-7 equal portions and give shape of round tikki..
  4. Dip each in cornflour slurry and coat each with bread crumbs as shown..
  5. Shallow fry tikkis with oil, on medium flame till crispy golden brown on both sides..
  6. Serve/ Relish Delicious Hot Paneer-Sprouts tikkis as savoury hot snack..

So that's going to wrap this up for this special food paneer-sprouts tikkis recipe. Thanks so much for reading. I'm confident that you will make this at home. There's gonna be more interesting food in home recipes coming up. Don't forget to save this page in your browser, and share it to your loved ones, colleague and friends. Thanks again for reading. Go on get cooking!

Recipe of Quick Vickys Harissa Paste for Moroccan/African Cooking GF DF
EF SF NF

Recipe of Quick Vickys Harissa Paste for Moroccan/African Cooking GF DF EF SF NF

Vickys Harissa Paste for Moroccan/African Cooking GF DF EF SF NF.

Vickys Harissa Paste for Moroccan/African Cooking GF DF EF SF NF

Hey everyone, it's me, Dave, welcome to our recipe page. Today, I will show you a way to prepare a distinctive dish, vickys harissa paste for moroccan/african cooking gf df ef sf nf. It is one of my favorites. This time, I will make it a little bit tasty. This is gonna smell and look delicious.

Vickys Harissa Paste for Moroccan/African Cooking GF DF EF SF NF is one of the most popular of recent trending foods on earth. It is enjoyed by millions every day. It is simple, it is quick, it tastes delicious. They're nice and they look wonderful. Vickys Harissa Paste for Moroccan/African Cooking GF DF EF SF NF is something that I have loved my whole life.

To begin with this particular recipe, we must first prepare a few components. You can have vickys harissa paste for moroccan/african cooking gf df ef sf nf using 11 ingredients and 10 steps. Here is how you cook that.

The ingredients needed to make Vickys Harissa Paste for Moroccan/African Cooking GF DF EF SF NF:

  1. {Get 120 grams of dried chillies of choice.
  2. {Make ready 1 tsp of caraway seeds.
  3. {Take 1 tsp of coriander seeds.
  4. {Make ready 1 tsp of cumin seeds.
  5. {Prepare 4 clove of garlic.
  6. {Get 2 tbsp of extra virgin olive oil plus extra.
  7. {Take 1 tbsp of tomato paste / puree.
  8. {Make ready 1 tsp of kosher salt.
  9. {Make ready 1 tsp of lemon juice.
  10. {Prepare 1 tsp of paprika.
  11. {Make ready 1/2 tsp of cayenne - optional.

Instructions to make Vickys Harissa Paste for Moroccan/African Cooking GF DF EF SF NF:

  1. Soften the chillies by soaking in hot water in a heatproof bowl for 30 minutes.
  2. Toast the seeds in a dry frying pan until fragrant then crush with a mortar & pestle or grind in a coffee grinder.
  3. Drain the chillies but reserve the liquid. Cut off the stems and discard the seeds then mix the chillies with the garlic, ground spices, tomato puree, lemon juice and salt in a blender.
  4. Pulse and drizzle in the olive oil as you go, forming a thick paste. Keep scraping down the sides and add some of the reserved chilli liquid until the paste is to desired consistency. It should be slightly thicker than tomato paste.
  5. Taste and adjust the seasonings. The flavour will really come together after a couple of days so make in advance then taste again and add more seasonings to taste.
  6. Store in a jar and pour a layer of olive oil on top before you seal the jar and add a fresh layer of oil everytime you take some paste out.
  7. Makes around 250mls of harissa paste and keeps well in the fridge for around 6 weeks.
  8. Use in African dishes and Moroccan tagines for a burst of heat and flavour.
  9. You can also add sundried tomatoes, roasted peppers, preserved lemon, fresh coriander leaf to your harissa.
  10. Serving amount is by teaspoon.

So that's going to wrap it up for this exceptional food vickys harissa paste for moroccan/african cooking gf df ef sf nf recipe. Thank you very much for reading. I am sure that you can make this at home. There is gonna be more interesting food at home recipes coming up. Don't forget to bookmark this page in your browser, and share it to your family, friends and colleague. Thank you for reading. Go on get cooking!

Simple Way to Prepare Award-winning Chicken and waffles with red chili
flake and honey

Simple Way to Prepare Award-winning Chicken and waffles with red chili flake and honey

Chicken and waffles with red chili flake and honey. Produce Croquette, Meatball, Mac & Cheese Ball & Snacks. Produce Croquette, Meatball, Mac & Cheese Ball and Other Stuffed Fried or Baked Snacks. As chicken cooks, combine honey, hot sauce, pepper flake, and a pinch of salt in a small pot.

Chicken and waffles with red chili flake and honey Instructions To a medium size pot, add honey, Jalapeño slices and red pepper flakes. Turn off heat and let cool in pot. Season chicken all over with salt and pepper.

Hey everyone, I hope you are having an incredible day today. Today, I will show you a way to prepare a special dish, chicken and waffles with red chili flake and honey. One of my favorites food recipes. This time, I will make it a little bit tasty. This is gonna smell and look delicious.

Chicken and waffles with red chili flake and honey is one of the most favored of recent trending foods in the world. It is easy, it's quick, it tastes yummy. It is enjoyed by millions daily. They're fine and they look fantastic. Chicken and waffles with red chili flake and honey is something which I've loved my entire life.

Produce Croquette, Meatball, Mac & Cheese Ball & Snacks. Produce Croquette, Meatball, Mac & Cheese Ball and Other Stuffed Fried or Baked Snacks. As chicken cooks, combine honey, hot sauce, pepper flake, and a pinch of salt in a small pot.

To get started with this recipe, we must prepare a few ingredients. You can have chicken and waffles with red chili flake and honey using 5 ingredients and 3 steps. Here is how you can achieve that.

The ingredients needed to make Chicken and waffles with red chili flake and honey:

  1. {Take of Waffle mix.
  2. {Take strips of Chicken.
  3. {Take 2 cups of honey.
  4. {Take of Red chili flakes to tasye.
  5. {Prepare of Non stick spray.

Add chicken and toss well with your hands, spreading the. Whisk together the water, lemon juice, cornstarch, chili sauce, soy sauce, and red pepper flakes in a small bowl; mix into the honey and ginger; bring to a boil. Make the Belgian Waffles and serve the chicken on top of the waffles, then drizzle generously with spicy honey butter sauce or maple syrup. Spicy Honey Butter Sauce In a small saucepan, melt butter over medium heat with honey, chili powder, and kosher salt.

Steps to make Chicken and waffles with red chili flake and honey:

  1. Mix waffle mix up while waffle machine warms up make waffles.
  2. Cook chicken strips either in oil or bake untill crislpy.
  3. Mix honey and red chili flakes warm then drizzle over chicken and waffles..

Whisk well until the mixture is incorporated and homogenized. Honey Garlic Chicken Thighs are boneless, skinless thighs seasoned to perfection with pepper, salt, red chili flakes, and other essential ingredients. You will use honey to add a sweet touch the chicken, red chili flakes to add a bit of spice, and minced garlic for a savory taste. These ingredients pair well together to create an undeniably delicious flavor. This is a favorite for many people.

So that's going to wrap it up for this special food chicken and waffles with red chili flake and honey recipe. Thanks so much for reading. I am confident you will make this at home. There's gonna be interesting food at home recipes coming up. Remember to bookmark this page in your browser, and share it to your loved ones, colleague and friends. Thanks again for reading. Go on get cooking!

Recipe of Super Quick Homemade Easy and Authentic Using Pancake Mix!
Matcha Pound Cake

Recipe of Super Quick Homemade Easy and Authentic Using Pancake Mix! Matcha Pound Cake

Easy and Authentic Using Pancake Mix! Matcha Pound Cake.

Easy and Authentic Using Pancake Mix! Matcha Pound Cake

Hello everybody, it's Louise, welcome to our recipe site. Today, I will show you a way to prepare a distinctive dish, easy and authentic using pancake mix! matcha pound cake. One of my favorites. This time, I am going to make it a little bit tasty. This is gonna smell and look delicious.

Easy and Authentic Using Pancake Mix! Matcha Pound Cake is one of the most popular of recent trending meals in the world. It is easy, it is fast, it tastes delicious. It's enjoyed by millions every day. They're fine and they look wonderful. Easy and Authentic Using Pancake Mix! Matcha Pound Cake is something which I've loved my entire life.

To get started with this particular recipe, we have to prepare a few ingredients. You can have easy and authentic using pancake mix! matcha pound cake using 6 ingredients and 7 steps. Here is how you cook it.

The ingredients needed to make Easy and Authentic Using Pancake Mix! Matcha Pound Cake:

  1. {Take 100 grams of ◎ Japanese Pancake mix.
  2. {Take 1 tbsp of ◎ Matcha.
  3. {Prepare 100 grams of Butter.
  4. {Take 80 grams of Sugar.
  5. {Take 2 of Eggs.
  6. {Make ready 2 tbsp of Milk.

Instructions to make Easy and Authentic Using Pancake Mix! Matcha Pound Cake:

  1. Make sure to bring the butter and sugar to room temperature. Mix the ◎ ingredients together. Pre-heat the oven to 170 °C..
  2. Put the butter in a bowl. Whisk until smooth and fluffy..
  3. Add the sugar in 2 batches. Whisk well with each addition, until the mixture is white and fluffy..
  4. Add the beaten eggs in about 4 batches, whisking well between each addition. Add the milk and mix well..
  5. Add the ◎ ingredients using a rubber spatula, using a cut and fold motion. The batter should become glossy..
  6. Pour the batter into the mold lined with a parchment paper, and drop it to the counter 2 or 3 times to remove the air. Bake in the pre-heated oven for 40 to 50 minutes..
  7. When a bamboo skewer stuck into the middle comes out clean, it's done! Take the cake out of the mold and cool on a cake rack..

So that's going to wrap it up with this special food easy and authentic using pancake mix! matcha pound cake recipe. Thanks so much for reading. I'm sure you can make this at home. There's gonna be more interesting food at home recipes coming up. Don't forget to bookmark this page in your browser, and share it to your loved ones, colleague and friends. Thanks again for reading. Go on get cooking!

Steps to Prepare Speedy White Chicken Chili (only 5 ingredients)

Steps to Prepare Speedy White Chicken Chili (only 5 ingredients)

White Chicken Chili (only 5 ingredients).

White Chicken Chili (only 5 ingredients)

Hello everybody, hope you are having an amazing day today. Today, we're going to prepare a distinctive dish, white chicken chili (only 5 ingredients). One of my favorites food recipes. This time, I'm gonna make it a bit unique. This is gonna smell and look delicious.

White Chicken Chili (only 5 ingredients) is one of the most favored of recent trending foods on earth. It's appreciated by millions daily. It's simple, it is fast, it tastes delicious. They are nice and they look fantastic. White Chicken Chili (only 5 ingredients) is something which I've loved my entire life.

To begin with this particular recipe, we must prepare a few ingredients. You can cook white chicken chili (only 5 ingredients) using 5 ingredients and 3 steps. Here is how you can achieve that.

The ingredients needed to make White Chicken Chili (only 5 ingredients):

  1. {Prepare 4 cups of chicken breast chopped and cooked. (Or 3 large chicken breasts frozen if you want to cook in the crockpot. Can shred after it’s cooked).
  2. {Make ready 2 cups of chicken broth-fat free.
  3. {Prepare 2 cups of salsa (mild, medium, hot, or verde, whichever you prefer).
  4. {Get 48 oz of jar of great northern beans.
  5. {Make ready 1 cup of 2% mozzarella cheese (or regular mozzarella if not watching calories).

Instructions to make White Chicken Chili (only 5 ingredients):

  1. Add all except the cheese to crockpot and cook on low 6-8 hours if chicken is frozen. Make sure the chicken is cooked through. If chicken is cooked just heat on stove until hot..
  2. Add the cheese about 5 mins before you’re going to eat and stir..
  3. Can add seasoning if you want. Can top with sour cream and more cheese if you’d like. Enjoy!.

So that is going to wrap this up with this exceptional food white chicken chili (only 5 ingredients) recipe. Thanks so much for your time. I am sure that you can make this at home. There's gonna be interesting food in home recipes coming up. Remember to save this page on your browser, and share it to your family, friends and colleague. Thank you for reading. Go on get cooking!

Recipe of Any-night-of-the-week Bamboo Shoot Miso Soup

Recipe of Any-night-of-the-week Bamboo Shoot Miso Soup

Bamboo Shoot Miso Soup.

Bamboo Shoot Miso Soup

Hey everyone, it's Brad, welcome to my recipe page. Today, I'm gonna show you how to prepare a special dish, bamboo shoot miso soup. It is one of my favorites. For mine, I'm gonna make it a little bit tasty. This will be really delicious.

Bamboo Shoot Miso Soup is one of the most favored of current trending meals on earth. It is appreciated by millions every day. It's simple, it's fast, it tastes delicious. They are nice and they look fantastic. Bamboo Shoot Miso Soup is something which I've loved my entire life.

To get started with this particular recipe, we have to prepare a few ingredients. You can cook bamboo shoot miso soup using 5 ingredients and 5 steps. Here is how you cook it.

The ingredients needed to make Bamboo Shoot Miso Soup:

  1. {Make ready 100 grams of Boiled bamboo shoot.
  2. {Prepare 1 of Wakame seaweed.
  3. {Take 1 of Green onions.
  4. {Make ready 3 tbsp of Miso.
  5. {Take 1 tsp of Granulated dashi stock.

Instructions to make Bamboo Shoot Miso Soup:

  1. Cut the bamboo shoot into bite-sized pieces..
  2. Add water to a pot and cook the bamboo shoots..
  3. Since the bamboo shoots are already cooked, it just needs to be warmed up. When hot, add the dashi base and turn off the heat then dissolve the miso into the soup..
  4. Add the wakame and sliced green onions..
  5. I made it with Kosan bamboo shoots.

So that is going to wrap this up with this special food bamboo shoot miso soup recipe. Thanks so much for your time. I am confident that you will make this at home. There is gonna be more interesting food at home recipes coming up. Don't forget to save this page in your browser, and share it to your family, colleague and friends. Thank you for reading. Go on get cooking!

Recipe of Super Quick Homemade Subway Style Sandwitch With Spaghetti

Recipe of Super Quick Homemade Subway Style Sandwitch With Spaghetti

Subway Style Sandwitch With Spaghetti.

Subway Style Sandwitch  With Spaghetti

Hello everybody, hope you're having an incredible day today. Today, I will show you a way to make a distinctive dish, subway style sandwitch with spaghetti. It is one of my favorites food recipes. For mine, I will make it a bit tasty. This will be really delicious.

Subway Style Sandwitch With Spaghetti is one of the most popular of recent trending meals in the world. It's easy, it's quick, it tastes yummy. It's enjoyed by millions daily. They're nice and they look wonderful. Subway Style Sandwitch With Spaghetti is something that I have loved my whole life.

To begin with this particular recipe, we have to first prepare a few components. You can have subway style sandwitch with spaghetti using 24 ingredients and 12 steps. Here is how you can achieve it.

The ingredients needed to make Subway Style Sandwitch With Spaghetti:

  1. {Make ready 1 of french bread (each).
  2. {Take 4 of cheese slices, diagonally cut into halves.
  3. {Get 1 cup of shredded iceberg lettuce.
  4. {Make ready 24 of tomato slices.
  5. {Prepare 24 of cucumber slices.
  6. {Prepare 1 cup of thinly sliced onions.
  7. {Get 1 cup of thinly sliced all colours capsicum.
  8. {Take to taste of salt and.
  9. {Get 1/2 cup of mayonnaise.
  10. {Prepare 2 tbsp of sweet chilli sauce.
  11. {Get of To Be Mixed Into A Mint-mayo Spread.
  12. {Prepare 1/2 cup of mayonnaise.
  13. {Get 2 tbsp of mint chutney.
  14. {Make ready of For Spaghetti.
  15. {Get 2 teaspoons of extra-virgin olive oil.
  16. {Take 1/2 of medium yellow onion, chopped.
  17. {Get 2 cloves of garlic, minced.
  18. {Make ready 1/2 teaspoon of salt.
  19. {Make ready 1/4 teaspoon of black pepper.
  20. {Take 1/4 teaspoon of red pepper flakes (optional).
  21. {Prepare 2 cups of vegetable broth.
  22. {Prepare 1 cup of diced tomatoes.
  23. {Make ready 1 packet of spaghetti noodles.
  24. {Prepare 1/4 cup of grated cheese.

Steps to make Subway Style Sandwitch With Spaghetti:

  1. Place a french bread on a clean, dry surface and cut it from the centre, so as to make 2 bread halves..
  2. Slit each bread horizontally using a sharp knife..
  3. Place all the 4 breads on a clean dry surface with both the sides open. Place 2 cheese slice halves on the upper side of each bread..
  4. Place all the breads on a baking tray and bake in a pre-heated oven at 200°c for 10 minutes. Keep aside. Place one toasted bread on a clean, dry surface and arrange lettuce evenly over the lower half of the toasted bread..
  5. Place tomato slices, cucumber slices, ¼ cup of onions, ¼ cup of capsicum, over it and sprinkle a little salt and pepper evenly over it..
  6. Put the chilli–mayo spread and the mint-mayo spread evenly over it according to taste..
  7. Sandwich it with the upper side of the toasted french bread and press it lightly..
  8. Serve immediately..
  9. Method of making Spaghetti..Heat olive oil in a medium pot over medium heat. Add onion and saute for 5-7 minutes, until tender..
  10. Add garlic and season with salt, pepper and red pepper flakes and saute another 30 seconds. Increase heat to high then add sliced tomatoes and vegetable broth. Bring to a boil..
  11. Add spaghetti noodles and stir until they wilt and fit in the pot. Cover the pot, reduce heat to medium-low and cook for 5 minutes..
  12. Remove from heat and let spaghetti sit, covered, for a few minutes Stir in grated cheese, taste and adjust seasonings. Serve with subway style Sandwitch..

So that is going to wrap it up with this exceptional food subway style sandwitch with spaghetti recipe. Thanks so much for reading. I am sure you can make this at home. There's gonna be more interesting food in home recipes coming up. Don't forget to save this page in your browser, and share it to your loved ones, friends and colleague. Thanks again for reading. Go on get cooking!

Recipe of Favorite Steam Egg with Dried Tiny Shrimps

Recipe of Favorite Steam Egg with Dried Tiny Shrimps

Steam Egg with Dried Tiny Shrimps.

Steam Egg with Dried Tiny Shrimps

Hello everybody, hope you are having an amazing day today. Today, we're going to prepare a distinctive dish, steam egg with dried tiny shrimps. It is one of my favorites food recipes. This time, I'm gonna make it a bit unique. This is gonna smell and look delicious.

Steam Egg with Dried Tiny Shrimps is one of the most favored of current trending foods on earth. It's appreciated by millions every day. It's simple, it is quick, it tastes delicious. Steam Egg with Dried Tiny Shrimps is something which I've loved my entire life. They are fine and they look wonderful.

To get started with this particular recipe, we must prepare a few components. You can have steam egg with dried tiny shrimps using 2 ingredients and 2 steps. Here is how you can achieve that.

The ingredients needed to make Steam Egg with Dried Tiny Shrimps:

  1. {Take 1 tbsp of tiny dried shrimps.
  2. {Take 2 of eggs.

Steps to make Steam Egg with Dried Tiny Shrimps:

  1. Crack and beat eggs then combined with shrimps.Beat properly..
  2. Add one glass of water in a pot and let it boil.After boiling put it egg mixture and steam for 15 mins over low heat..

So that's going to wrap this up for this exceptional food steam egg with dried tiny shrimps recipe. Thanks so much for reading. I'm confident that you can make this at home. There is gonna be more interesting food at home recipes coming up. Don't forget to bookmark this page on your browser, and share it to your loved ones, colleague and friends. Thanks again for reading. Go on get cooking!

Steps to Make Any-night-of-the-week Steamed Bread with Cherry Blossom
and Green Tea

Steps to Make Any-night-of-the-week Steamed Bread with Cherry Blossom and Green Tea

Steamed Bread with Cherry Blossom and Green Tea.

Steamed Bread with Cherry Blossom and Green Tea

Hello everybody, it's John, welcome to my recipe site. Today, I'm gonna show you how to make a special dish, steamed bread with cherry blossom and green tea. It is one of my favorites food recipes. This time, I will make it a little bit tasty. This will be really delicious.

Steamed Bread with Cherry Blossom and Green Tea is one of the most popular of current trending meals on earth. It's enjoyed by millions every day. It is easy, it is quick, it tastes yummy. Steamed Bread with Cherry Blossom and Green Tea is something that I've loved my entire life. They're fine and they look wonderful.

To begin with this recipe, we must prepare a few components. You can cook steamed bread with cherry blossom and green tea using 8 ingredients and 7 steps. Here is how you cook it.

The ingredients needed to make Steamed Bread with Cherry Blossom and Green Tea:

  1. {Get 100 grams of Cake flour.
  2. {Make ready 1 tsp of Baking powder.
  3. {Make ready 40 grams of Sugar.
  4. {Make ready 2 tbsp of Vegetable oil.
  5. {Get 100 ml of Milk.
  6. {Get 2 tsp of Matcha.
  7. {Prepare 6 tsp of Smooth sweet red bean paste.
  8. {Get 6 of Salted cherry blossoms.

Steps to make Steamed Bread with Cherry Blossom and Green Tea:

  1. Pour milk into the matcha. Add little by little to dissolve the powder so that it doesn't clump. Add sugar and vegetable oil..
  2. Sift flour and baking powder into the mixture and mix..
  3. Put cupcake liners (about 7 cm in diameter) in ramekins and pour small amount of the mixture. Put the red bean paste on top..
  4. Pour the remaining mixture over it. Soak the salted cherry blossoms in water for a while to de-salt. Put the blossoms as topping..
  5. Steam for 10 minutes over the high heat..
  6. Why don't you put the bread in a box like this for cherry-blossom-viewing? This is much more delicious than a store-bought one!.
  7. I created a variation of this recipe. "Steamed Bread with Cherry Blossom". https://cookpad.com/us/recipes/154148-steamed-bread-with-cherry-blossom.

So that's going to wrap this up with this special food steamed bread with cherry blossom and green tea recipe. Thanks so much for reading. I am sure you will make this at home. There's gonna be interesting food at home recipes coming up. Remember to bookmark this page in your browser, and share it to your family, friends and colleague. Thanks again for reading. Go on get cooking!

Step-by-Step Guide to Prepare Award-winning Potato pancake

Step-by-Step Guide to Prepare Award-winning Potato pancake

Potato pancake. Potato pancakes, raggmunk, draniki, deruny, latkes or boxties are shallow-fried pancakes of grated or ground potato, matzo meal or flour and a binding ingredient such as egg or applesauce. Over the years, the recipe of potato pancakes has been considered one of the most sought after. The dish is cooked easily, and the result is impressive to everyone.

Potato pancake Looking for potato pancake and latke recipes? So simple, yet unbelievably tasty, these Classic Potato Pancakes are not to be missed! Follow my simple instructions and make this easy treat today!

Hello everybody, it is Louise, welcome to our recipe site. Today, we're going to prepare a distinctive dish, potato pancake. One of my favorites. For mine, I'm gonna make it a bit tasty. This will be really delicious.

Potato pancake is one of the most favored of current trending meals in the world. It's easy, it is fast, it tastes delicious. It is appreciated by millions daily. Potato pancake is something which I've loved my entire life. They're nice and they look fantastic.

Potato pancakes, raggmunk, draniki, deruny, latkes or boxties are shallow-fried pancakes of grated or ground potato, matzo meal or flour and a binding ingredient such as egg or applesauce. Over the years, the recipe of potato pancakes has been considered one of the most sought after. The dish is cooked easily, and the result is impressive to everyone.

To begin with this recipe, we must first prepare a few ingredients. You can have potato pancake using 9 ingredients and 5 steps. Here is how you cook that.

The ingredients needed to make Potato pancake:

  1. {Prepare 1 cup of besan.
  2. {Make ready 1/2 cup of rice flour.
  3. {Prepare 1/4 cup of rava.
  4. {Prepare 3 spoons of oats.
  5. {Take 1 cup of curd.
  6. {Get 2 of potatoes raw grated.
  7. {Get 1 of onion chopped.
  8. {Take Few of Green chillies chopped.
  9. {Prepare As per taste of Red chillli and salt.

Everyone loves crispy potatoes and these Potato Pancakes have mashed potatoes between two crispy and buttery sides. Add some sour cream and you're in heaven. Polish potato pancakes, known as placki kartoflane or placki ziemniaczane in Polish, are delicious and delightful. Mashed potato keeps these potato pancakes soft in the middle, but crisp on the outside.

Instructions to make Potato pancake:

  1. In a big bowl add all the flours..
  2. Add chopped onion, green chilli, red chilli, salt and mix..
  3. Add grated raw potato and curd. Mix everything well.Then add water and make a batter..
  4. On a frying pan add little oil and make pancakes. If you want them to be fluffy you can add little eno.Serve with sauce of your choice..
  5. Very good for children's tiffin..

They're delicious topped with bacon, smoked salmon, avocado or egg. Potato pancakes, Buttermilk sweet potato pancakes, Potato Pancakes. See more ideas about potato pancakes, german potato pancakes, recipes. A recipe blog about cultural food, cooking, baking, and travel! Use up leftover mashed potato in these breakfast pancakes, delicious with bacon and eggs, from BBC Good Food.

So that is going to wrap this up with this exceptional food potato pancake recipe. Thank you very much for your time. I am confident that you can make this at home. There's gonna be more interesting food in home recipes coming up. Don't forget to bookmark this page on your browser, and share it to your loved ones, friends and colleague. Thanks again for reading. Go on get cooking!

Simple Way to Make Ultimate Crock pot Chicken and Rice

Simple Way to Make Ultimate Crock pot Chicken and Rice

Crock pot Chicken and Rice.

Crock pot Chicken and Rice

Hello everybody, I hope you're having an amazing day today. Today, I will show you a way to make a distinctive dish, crock pot chicken and rice. It is one of my favorites. This time, I will make it a little bit unique. This is gonna smell and look delicious.

Crock pot Chicken and Rice is one of the most popular of recent trending meals on earth. It's enjoyed by millions every day. It is easy, it is quick, it tastes yummy. Crock pot Chicken and Rice is something that I've loved my entire life. They are fine and they look fantastic.

To get started with this particular recipe, we have to first prepare a few ingredients. You can have crock pot chicken and rice using 6 ingredients and 2 steps. Here is how you can achieve that.

The ingredients needed to make Crock pot Chicken and Rice:

  1. {Take 1 3/4 lb of skinless and boneless chicken breasts.
  2. {Get 26 oz of turkey or chicken gravy.
  3. {Take 15 oz of ranch dressing.
  4. {Make ready 28 oz of cream of chicken.
  5. {Make ready packages of frozen mixed veggies.
  6. {Take 1 packages of knorr cheesy broccoli rice.

Steps to make Crock pot Chicken and Rice:

  1. Pour gravy into crock pot, place chicken breast on top add ranch dressing and cream of chicken soup. Cook on low 6-8 hours.
  2. Add vegetables and rice. Cook on high for 45-60 minutes..

So that's going to wrap it up with this special food crock pot chicken and rice recipe. Thanks so much for reading. I am confident you can make this at home. There's gonna be interesting food in home recipes coming up. Don't forget to bookmark this page in your browser, and share it to your family, colleague and friends. Thank you for reading. Go on get cooking!

Easiest Way to Make Favorite Macrobiotic ^^ Onion and Wakame Seaweed
Tossed with Plum Vinegar

Easiest Way to Make Favorite Macrobiotic ^^ Onion and Wakame Seaweed Tossed with Plum Vinegar

Macrobiotic ^^ Onion and Wakame Seaweed Tossed with Plum Vinegar.

Macrobiotic ^^ Onion and Wakame Seaweed Tossed with Plum Vinegar

Hello everybody, hope you're having an incredible day today. Today, we're going to make a distinctive dish, macrobiotic ^^ onion and wakame seaweed tossed with plum vinegar. It is one of my favorites. For mine, I'm gonna make it a bit unique. This will be really delicious.

Macrobiotic ^^ Onion and Wakame Seaweed Tossed with Plum Vinegar is one of the most well liked of current trending foods on earth. It is appreciated by millions daily. It's easy, it is fast, it tastes delicious. They are nice and they look fantastic. Macrobiotic ^^ Onion and Wakame Seaweed Tossed with Plum Vinegar is something which I have loved my whole life.

To get started with this particular recipe, we have to prepare a few components. You can have macrobiotic ^^ onion and wakame seaweed tossed with plum vinegar using 5 ingredients and 4 steps. Here is how you cook that.

The ingredients needed to make Macrobiotic ^^ Onion and Wakame Seaweed Tossed with Plum Vinegar:

  1. {Get 1/3 of the amount of onion Wakame seaweed.
  2. {Make ready 1/2 medium of Onion.
  3. {Prepare 1 tbsp of plus 1 teaspoon Ume (plum) vinegar.
  4. {Get 1 of to 2 tablespoons Ground sesame seeds.
  5. {Prepare 2 of leaves Shiso leaves (optional).

Instructions to make Macrobiotic ^^ Onion and Wakame Seaweed Tossed with Plum Vinegar:

  1. Peel the skin of the onion, then slice thinly. If the onion is spicy, soak in water, then drain..
  2. Put the onion slices in a bowl, add 1 tablespoon ume vinegar, rub it into the onion with your hands, then let sit..
  3. Soak the wakame seaweed in water to remove the excess salt, then chop into bite-sized pieces..
  4. Squeeze out the excess water from the onion, then add 1 teaspoon ume vinegar. Add the wakame and sesame seeds. Garnish with shiso leaves..

So that's going to wrap this up for this special food macrobiotic ^^ onion and wakame seaweed tossed with plum vinegar recipe. Thanks so much for reading. I am confident that you can make this at home. There is gonna be more interesting food at home recipes coming up. Remember to save this page in your browser, and share it to your family, colleague and friends. Thanks again for reading. Go on get cooking!

Recipe of Perfect RAW MANGO SUMMER DRINK (KAIRI PANHE)

Recipe of Perfect RAW MANGO SUMMER DRINK (KAIRI PANHE)

RAW MANGO SUMMER DRINK (KAIRI PANHE). A perfect raw mango drink recipe to quench your thirst in summers with good nutritional value & helpful in digestion. Easy to make with ready ingredients. If you liked watching this video then don't forget to like , share and subscribe.

RAW MANGO SUMMER DRINK (KAIRI PANHE) Summer cool drink recipe - kairi panha recipe is a raw green mango recipe. It is also known as aam panna. This recipe comes to you from Maharashtra, a western Indian state. 'Kairi Panhe' or 'Kairiche pahne' is a maharashtrian name for this raw mango drink.

Hey everyone, it is Brad, welcome to our recipe page. Today, we're going to prepare a distinctive dish, raw mango summer drink (kairi panhe). One of my favorites food recipes. This time, I will make it a little bit unique. This will be really delicious.

A perfect raw mango drink recipe to quench your thirst in summers with good nutritional value & helpful in digestion. Easy to make with ready ingredients. If you liked watching this video then don't forget to like , share and subscribe.

RAW MANGO SUMMER DRINK (KAIRI PANHE) is one of the most well liked of current trending meals on earth. It is appreciated by millions every day. It's easy, it's quick, it tastes yummy. They're fine and they look wonderful. RAW MANGO SUMMER DRINK (KAIRI PANHE) is something that I've loved my entire life.

To begin with this recipe, we must first prepare a few components. You can cook raw mango summer drink (kairi panhe) using 12 ingredients and 6 steps. Here is how you cook that.

The ingredients needed to make RAW MANGO SUMMER DRINK (KAIRI PANHE):

  1. {Make ready of Raw Mango Panhe.
  2. {Take 1 cup of peeled and grated raw mango.
  3. {Prepare 1 cup of sugar.
  4. {Prepare 1/4 tsp of cardamom powder.
  5. {Take 1/4 tsp of black salt.
  6. {Prepare of Few strands of saffron.
  7. {Prepare of Boiled raw mango panhe.
  8. {Get 1 of medium size raw mango washed, boiled and cooled.
  9. {Get 1 cup of grated jaggery or jaggery powder.
  10. {Take 1/4 tsp of cardamom powder.
  11. {Make ready 1/4 tsp of black salt.
  12. {Prepare of Few strands of saffron.

A soothing raw mango drink made and served during hot summer months in India. It is made with raw, green mangoes which are sour and unripe in the summer. What are the best Mangoes for making Panna? Make sure you buy unripe mangoes which are green and feel tough from the outside.

Steps to make RAW MANGO SUMMER DRINK (KAIRI PANHE):

  1. For preparing PANHE with boiled raw mango, extract all the pulp from raw mango in a mixing bowl..
  2. Add jaggery (1 cup pulp to one cup jaggery). Add cardamom powder, black salt and saffron. Mix thoroughly. Add water about 2-3 glasses and again mix thoroughly..
  3. Serve with ice cubes and mint leaves..
  4. For preparing grated mango PANHE, put grated raw mango, sugar, Cardamom powder, black salt and saffron in a mixer jar. Blend till smooth texture is formed..
  5. Empty the mixer jar in a bowl. Add 2-3 glasses of water and stir thoroughly..
  6. Serve with ice cubes and mint leaves..

Kairi Panha is a traditional Maharashtrian raw mango drink. Here are three different preparations to choose from. Kairi Panha is a is a sour and sweet, Maharashtrian favorite, summer cooler made using raw mango. Kachchi kairi, or raw mango, is etched in all of our summer memories, as strongly as are the scorching winds, the uncomfortable heat and the Kairi ka panna or a drink made from green (raw) mangoes is made across the country at the advent of summers, and stored in glass jars to be served. Kairi (Raw Mango)Panha-Aam Panna Recipe Procedure.

So that is going to wrap it up with this exceptional food raw mango summer drink (kairi panhe) recipe. Thank you very much for reading. I am sure that you will make this at home. There is gonna be more interesting food at home recipes coming up. Don't forget to bookmark this page on your browser, and share it to your family, friends and colleague. Thanks again for reading. Go on get cooking!

Steps to Make Super Quick Homemade Chicken Teriyaki and Fried Rice

Steps to Make Super Quick Homemade Chicken Teriyaki and Fried Rice

Chicken Teriyaki and Fried Rice.

Chicken Teriyaki and Fried Rice

Hello everybody, it's John, welcome to my recipe page. Today, I'm gonna show you how to make a distinctive dish, chicken teriyaki and fried rice. It is one of my favorites. For mine, I will make it a bit tasty. This is gonna smell and look delicious.

Chicken Teriyaki and Fried Rice is one of the most favored of recent trending foods on earth. It is enjoyed by millions every day. It's easy, it's quick, it tastes delicious. They are nice and they look wonderful. Chicken Teriyaki and Fried Rice is something which I've loved my whole life.

To begin with this particular recipe, we have to prepare a few components. You can cook chicken teriyaki and fried rice using 12 ingredients and 6 steps. Here is how you can achieve it.

The ingredients needed to make Chicken Teriyaki and Fried Rice:

  1. {Get of chicken breasts, cubed.
  2. {Make ready of teriyaki sauce.
  3. {Take of oil.
  4. {Prepare of onion, diced.
  5. {Prepare of garlic, minced.
  6. {Take of carrots, diced.
  7. {Make ready of broccoli florets.
  8. {Make ready of eggsies, beaten.
  9. {Prepare of cooked brown rice.
  10. {Take of soy sauce.
  11. {Prepare of sesame oil.
  12. {Prepare of Pepper.

Instructions to make Chicken Teriyaki and Fried Rice:

  1. Marinate the chicken in teriyaki sauce in the refrigerator for at least one hour..
  2. In a wok or deep skillet, add the chicken in the teriyaki marinade and cook thoroughly over high heat. Set aside..
  3. In the same pan, add the oil and cook onion, garlic, and carrots until onions are translucent..
  4. Add broccoli and cook an additional 3-4 minutes. Push all of the cooked vegetables to the side of the pan..
  5. Beat the eggsies and pour into the cleared half of the pan. Scramble the eggsies and mix with the rest of the veggies..
  6. Add rice (already cooked), soy sauce, sesame oil, pepper, and the cooked chicken. Mix well and let the rice cooker until slightly crispy..

So that is going to wrap this up for this exceptional food chicken teriyaki and fried rice recipe. Thanks so much for reading. I'm confident you can make this at home. There is gonna be more interesting food at home recipes coming up. Remember to bookmark this page in your browser, and share it to your family, friends and colleague. Thanks again for reading. Go on get cooking!

Steps to Prepare Ultimate Eggless coconut cookies

Steps to Prepare Ultimate Eggless coconut cookies

Eggless coconut cookies.

Eggless coconut cookies

Hello everybody, hope you are having an amazing day today. Today, I'm gonna show you how to prepare a distinctive dish, eggless coconut cookies. It is one of my favorites food recipes. This time, I will make it a little bit unique. This will be really delicious.

Eggless coconut cookies is one of the most favored of current trending foods in the world. It is enjoyed by millions every day. It is simple, it's quick, it tastes yummy. They're fine and they look wonderful. Eggless coconut cookies is something which I've loved my entire life.

To begin with this particular recipe, we must prepare a few components. You can have eggless coconut cookies using 6 ingredients and 6 steps. Here is how you can achieve it.

The ingredients needed to make Eggless coconut cookies:

  1. {Make ready 250 g of butter.
  2. {Make ready 2 cups of flour.
  3. {Take 1/2 cup of coconut flakes.
  4. {Take 1/4 cup of sugar.
  5. {Get 1 table spoon of powdered milk.
  6. {Prepare 1 teaspoon of coconut flavor.

Steps to make Eggless coconut cookies:

  1. Zaki hade ingredieants dinki gaba daya ki ki kwaba shi ya hade yayli laushi.
  2. Sai ki rage kadan kisa masa colour ki murza sosai colour din ya hade.
  3. Saiki mulmula kisa spoon ki fidda shape, ki dauko wancan mai colour ki mulmula shi kina sakawa asaman sa yadda yake a pic..
  4. Sannan ki sa paper ki jera a baking tray ki gasa na minti 20.
  5. Bayan kin gasa👇.
  6. 👌.

So that's going to wrap this up with this exceptional food eggless coconut cookies recipe. Thank you very much for reading. I'm sure you will make this at home. There's gonna be more interesting food at home recipes coming up. Don't forget to save this page in your browser, and share it to your family, colleague and friends. Thank you for reading. Go on get cooking!

Easiest Way to Prepare Ultimate My Chicken-Bacon Alfredo (egg-free)

Easiest Way to Prepare Ultimate My Chicken-Bacon Alfredo (egg-free)

My Chicken-Bacon Alfredo (egg-free).

My Chicken-Bacon Alfredo (egg-free)

Hello everybody, it's me again, Dan, welcome to my recipe page. Today, we're going to prepare a distinctive dish, my chicken-bacon alfredo (egg-free). It is one of my favorites food recipes. This time, I'm gonna make it a bit tasty. This is gonna smell and look delicious.

My Chicken-Bacon Alfredo (egg-free) is one of the most popular of recent trending foods on earth. It's enjoyed by millions daily. It is simple, it is quick, it tastes delicious. They're fine and they look wonderful. My Chicken-Bacon Alfredo (egg-free) is something that I've loved my whole life.

To begin with this recipe, we have to first prepare a few ingredients. You can have my chicken-bacon alfredo (egg-free) using 11 ingredients and 8 steps. Here is how you cook it.

The ingredients needed to make My Chicken-Bacon Alfredo (egg-free):

  1. {Take 1 lb of penne noodles.
  2. {Get 1/2 lb of bacon.
  3. {Take 1/2 lb of chicken breast.
  4. {Prepare 3 stick of butter.
  5. {Take 1/4 cup of milk.
  6. {Take 1 pints of heavy whipping cream.
  7. {Get tsp of seasoned salt.
  8. {Get pinch of pepper.
  9. {Make ready pinch of basil.
  10. {Get pinch of garlic powder.
  11. {Get of grated parmesan cheese, asiago, romano.

Steps to make My Chicken-Bacon Alfredo (egg-free):

  1. Boil noodles, drain, set aside.
  2. If not already, cook and season chicken and bacon. Cut chicken into slices and break bacon into pieces.
  3. Melt butter down in microwave safe bowl 1 minute.
  4. In a baking casserole dish, add noodles, cream, milk, seasoning salt, pepper, melted butter chicken and bacon and mix.
  5. Bake 350°F for 15-20 minutes.
  6. Let sauce thicken 10 minutes.
  7. Serve topped with fresh grated parmasan, romano and asiago..
  8. Check my chicken-bacon Caesar wraps recipe to use up your leftover meats! https://cookpad.com/us/recipes/347403-chicken-bacon-caesar-wrap.

So that's going to wrap it up for this exceptional food my chicken-bacon alfredo (egg-free) recipe. Thank you very much for reading. I am confident you will make this at home. There's gonna be interesting food at home recipes coming up. Remember to save this page in your browser, and share it to your loved ones, friends and colleague. Thank you for reading. Go on get cooking!

Easiest Way to Make Super Quick Homemade Bacon Wrapped Jalapeno Popper
Chicken

Easiest Way to Make Super Quick Homemade Bacon Wrapped Jalapeno Popper Chicken

Bacon Wrapped Jalapeno Popper Chicken.

Bacon Wrapped Jalapeno Popper Chicken

Hey everyone, it's Brad, welcome to my recipe site. Today, we're going to make a distinctive dish, bacon wrapped jalapeno popper chicken. It is one of my favorites. This time, I will make it a little bit unique. This will be really delicious.

Bacon Wrapped Jalapeno Popper Chicken is one of the most favored of current trending meals on earth. It's enjoyed by millions every day. It is easy, it is quick, it tastes delicious. They are fine and they look wonderful. Bacon Wrapped Jalapeno Popper Chicken is something which I've loved my whole life.

To begin with this recipe, we must prepare a few components. You can have bacon wrapped jalapeno popper chicken using 5 ingredients and 10 steps. Here is how you cook it.

The ingredients needed to make Bacon Wrapped Jalapeno Popper Chicken:

  1. {Make ready 6 large of Chicken Breast.
  2. {Make ready 12 slice of Bacon.
  3. {Take 1 cup of Softened Cream Cheese.
  4. {Make ready 1/2 cup of Diced Jalapenos.
  5. {Take 1 of Pepper (For Flavor).

Steps to make Bacon Wrapped Jalapeno Popper Chicken:

  1. Preheat oven to 400°F Fahrenheit..
  2. Flatten chicken breasts out to about 1/4 of an inch..
  3. Season the chicken with pepper for flavor. (Or whatever you might prefer.).
  4. Spread cream cheese filling across each chicken breast evenly..
  5. Spread diced jalapenos over cream cheese spread (the more, the hotter).
  6. Roll up chicken from bottom end to top..
  7. Wrap 2 slices of bacon around each chicken breast & lay flat on baking pan..
  8. Bake for 25-35 minutes (depending on how fast your oven cooks.).
  9. Set on broil for a couple minutes to let bacon get crispy. (If you don't prefer crispy bacon, just turn oven off & let it sit for a few extra minutes.).
  10. Serve with any side dish. (Ex: rice, potatoes, mac & cheese).

So that is going to wrap it up with this special food bacon wrapped jalapeno popper chicken recipe. Thank you very much for your time. I'm confident that you will make this at home. There's gonna be more interesting food at home recipes coming up. Don't forget to save this page on your browser, and share it to your family, friends and colleague. Thank you for reading. Go on get cooking!

How to Make Perfect Green Garlic Chutney (Hare Lesun ki Chutney)

How to Make Perfect Green Garlic Chutney (Hare Lesun ki Chutney)

Green Garlic Chutney (Hare Lesun ki Chutney).

Green Garlic Chutney (Hare Lesun ki Chutney)

Hello everybody, I hope you're having an incredible day today. Today, I'm gonna show you how to prepare a distinctive dish, green garlic chutney (hare lesun ki chutney). One of my favorites food recipes. This time, I am going to make it a little bit unique. This will be really delicious.

Green Garlic Chutney (Hare Lesun ki Chutney) is one of the most favored of current trending meals in the world. It is enjoyed by millions daily. It is easy, it is fast, it tastes delicious. They are fine and they look wonderful. Green Garlic Chutney (Hare Lesun ki Chutney) is something that I've loved my entire life.

To get started with this particular recipe, we must prepare a few components. You can have green garlic chutney (hare lesun ki chutney) using 7 ingredients and 4 steps. Here is how you cook that.

The ingredients needed to make Green Garlic Chutney (Hare Lesun ki Chutney):

  1. {Get 1 bunch of green garlic.
  2. {Make ready 1 bunch of coriander.
  3. {Take 1 of small bowl roasted split gram, chana.
  4. {Take 3 of green chillies, destalked.
  5. {Make ready 1 tsp of sugar.
  6. {Get 1 of Juice of lemon.
  7. {Prepare of as required Water.

Steps to make Green Garlic Chutney (Hare Lesun ki Chutney):

  1. Wash and finely chop coriander and green garlic after removing their roots..
  2. Chop green chillies into small pieces..
  3. Put all the ingredients in the mixer grinder, except lemon juice. Add little water and grind into a very fine paste(chutney)..
  4. Remove the paste into a bowl. Add lemon juice to it. Mix it well with a spoon. Sweet & spicy garlic chutney is ready. Enjoy it with pakoras or as a side dish with regular sabzi-roti..

So that's going to wrap this up for this exceptional food green garlic chutney (hare lesun ki chutney) recipe. Thank you very much for reading. I am sure you can make this at home. There is gonna be interesting food at home recipes coming up. Don't forget to save this page on your browser, and share it to your loved ones, colleague and friends. Thanks again for reading. Go on get cooking!

Step-by-Step Guide to Prepare Favorite Kim's chicken bacon wrap

Step-by-Step Guide to Prepare Favorite Kim's chicken bacon wrap

Kim's chicken bacon wrap.

Kim's chicken bacon wrap

Hello everybody, it's me again, Dan, welcome to our recipe site. Today, I will show you a way to make a special dish, kim's chicken bacon wrap. It is one of my favorites. This time, I'm gonna make it a bit unique. This will be really delicious.

Kim's chicken bacon wrap is one of the most favored of recent trending meals on earth. It's enjoyed by millions daily. It's simple, it is quick, it tastes yummy. Kim's chicken bacon wrap is something that I've loved my entire life. They are fine and they look wonderful.

To get started with this recipe, we have to prepare a few ingredients. You can cook kim's chicken bacon wrap using 6 ingredients and 5 steps. Here is how you can achieve that.

The ingredients needed to make Kim's chicken bacon wrap:

  1. {Make ready 20 of chicken nuggets cooked.
  2. {Prepare 1 of lettuce.
  3. {Prepare 1 of tomato.
  4. {Make ready 8 of strips of bacon.
  5. {Prepare 4 of flour tortillas.
  6. {Prepare 1 of ranch dressing.

Instructions to make Kim's chicken bacon wrap:

  1. cook 8 strips of bacon.
  2. bake chicken nuggets according to package.
  3. diced tomatoes.
  4. put 5 pieces chicken two slices of bacon diced tomatoes lettuce and ranch dressing into each tortilla.
  5. Wrap burrito style and enjoy.

So that is going to wrap it up with this exceptional food kim's chicken bacon wrap recipe. Thanks so much for reading. I'm confident that you can make this at home. There is gonna be more interesting food in home recipes coming up. Don't forget to save this page in your browser, and share it to your family, colleague and friends. Thank you for reading. Go on get cooking!

Simple Way to Make Super Quick Homemade Tuna and tomato sandwich

Simple Way to Make Super Quick Homemade Tuna and tomato sandwich

Tuna and tomato sandwich.

Tuna and tomato sandwich

Hello everybody, I hope you are having an amazing day today. Today, I'm gonna show you how to make a special dish, tuna and tomato sandwich. It is one of my favorites food recipes. This time, I am going to make it a bit unique. This is gonna smell and look delicious.

Tuna and tomato sandwich is one of the most favored of recent trending meals in the world. It is easy, it is quick, it tastes yummy. It is appreciated by millions daily. Tuna and tomato sandwich is something that I've loved my entire life. They're fine and they look fantastic.

To begin with this recipe, we must first prepare a few ingredients. You can cook tuna and tomato sandwich using 18 ingredients and 6 steps. Here is how you cook it.

The ingredients needed to make Tuna and tomato sandwich:

  1. {Make ready of patty.
  2. {Make ready 2 cup of canned tuna.
  3. {Make ready 1 large of egg.
  4. {Prepare 1 tsp of sweet basil.
  5. {Take 1 tbsp of xanthan gum.
  6. {Get 1/2 tsp of dill weed.
  7. {Make ready 1/2 tsp of cilantro.
  8. {Get of salt and pepper.
  9. {Make ready 1/2 cup of grated parmesan cheese.
  10. {Prepare of tomato.
  11. {Take 2 medium of tomatoes.
  12. {Make ready 1 of salt and pepper.
  13. {Get of frying.
  14. {Make ready 1/4 cup of vegetable oil.
  15. {Take of topping.
  16. {Make ready 1/4 cup of lime juice.
  17. {Make ready of optional.
  18. {Prepare 1 large of poached egg.

Instructions to make Tuna and tomato sandwich:

  1. Drain the tuna.
  2. Put tuna, egg, basil, dill weed, xanthan gum, and cilantro into a bowl. Mix well. Then add parmesan cheese mix and form into a thin patty.
  3. Take a pan add oil fry the patties fry till done and a bit crispy. Move to paper towels to absorb excess oil..
  4. Take half the patties set on plates. Slice the tomatoes and put a slice on each patty and egg. Salt and pepper to taste. Cover with the other half of patties..
  5. Squeeze lime juice over the top of sandwiches..
  6. Add a little garlic if you like.

So that is going to wrap this up with this special food tuna and tomato sandwich recipe. Thank you very much for reading. I'm sure that you will make this at home. There's gonna be interesting food at home recipes coming up. Remember to save this page on your browser, and share it to your loved ones, colleague and friends. Thanks again for reading. Go on get cooking!

Recipe of Perfect Low Calorie High Protein Salad

Recipe of Perfect Low Calorie High Protein Salad

Low Calorie High Protein Salad.

Low Calorie High Protein Salad

Hey everyone, it's John, welcome to our recipe page. Today, I will show you a way to make a distinctive dish, low calorie high protein salad. It is one of my favorites food recipes. For mine, I will make it a bit tasty. This is gonna smell and look delicious.

Low Calorie High Protein Salad is one of the most favored of current trending foods in the world. It's easy, it is quick, it tastes yummy. It is enjoyed by millions daily. They are fine and they look wonderful. Low Calorie High Protein Salad is something which I've loved my whole life.

To begin with this particular recipe, we must first prepare a few components. You can cook low calorie high protein salad using 12 ingredients and 4 steps. Here is how you can achieve it.

The ingredients needed to make Low Calorie High Protein Salad:

  1. {Take 50 grams of Red Pepper.
  2. {Make ready 50 grams of Green Pepper.
  3. {Make ready 30 grams of Red Onion.
  4. {Take 60 of Mixed Leaves.
  5. {Make ready 2 medium of Boiled Egg Whites.
  6. {Get 100 grams of Diced Cooked Chicken.
  7. {Get 4 each of Cherry Tomatoes.
  8. {Get 10 ml of Balsamic Vinegar.
  9. {Take 1 pinch of Salt & Pepper.
  10. {Make ready 1 small of Dy Pan Fried Walnuts.
  11. {Get 1 slice of Wholemeal bread.
  12. {Make ready 1 medium of Grated Carrot.

Instructions to make Low Calorie High Protein Salad:

  1. Turn oven on to 160c. Mix chilli powder and paprika with a drop of water or oil and marinade the chicken before putting in the oven. When placed in the oven leave until cooked through, approx 20 minutes. Alternatively boil the chicken for 10 to 15 minutes..
  2. Prepare vegetables and leave in a bowl. Pour balsamic vinegar over salad leaves and vegetables and mix well..
  3. Heat a dry frying pan on a medium heat. Add the crushed walnuts to the pan shaking frequently to avoid burning. Remove from heat after approx 3 mins and add to your salad..
  4. Assemble food and enjoy.

So that is going to wrap it up for this special food low calorie high protein salad recipe. Thank you very much for your time. I am confident that you will make this at home. There is gonna be interesting food in home recipes coming up. Remember to save this page on your browser, and share it to your loved ones, friends and colleague. Thanks again for reading. Go on get cooking!